Stretches
Here are some suggested stretches to use for climbing sessions. I would recommend doing the dynamic stretches—slow, controlled, and repeated movements—before climbing and the static stretches—holding a position for a period of time—after climbing. Dynamic stretches help “loosen and activate the muscles and lubricate the joints” [2]. Static stretches “contribute to the reparation process of the muscles and can improve flexibility” [2]. This type of stretch should not be done before climbing or warming up because “when everything is cold, the fibers aren’t prepared and may be damaged” [5].
Dynamic Stretches
All dynamic stretches were taken from a video found in the citations page [4].
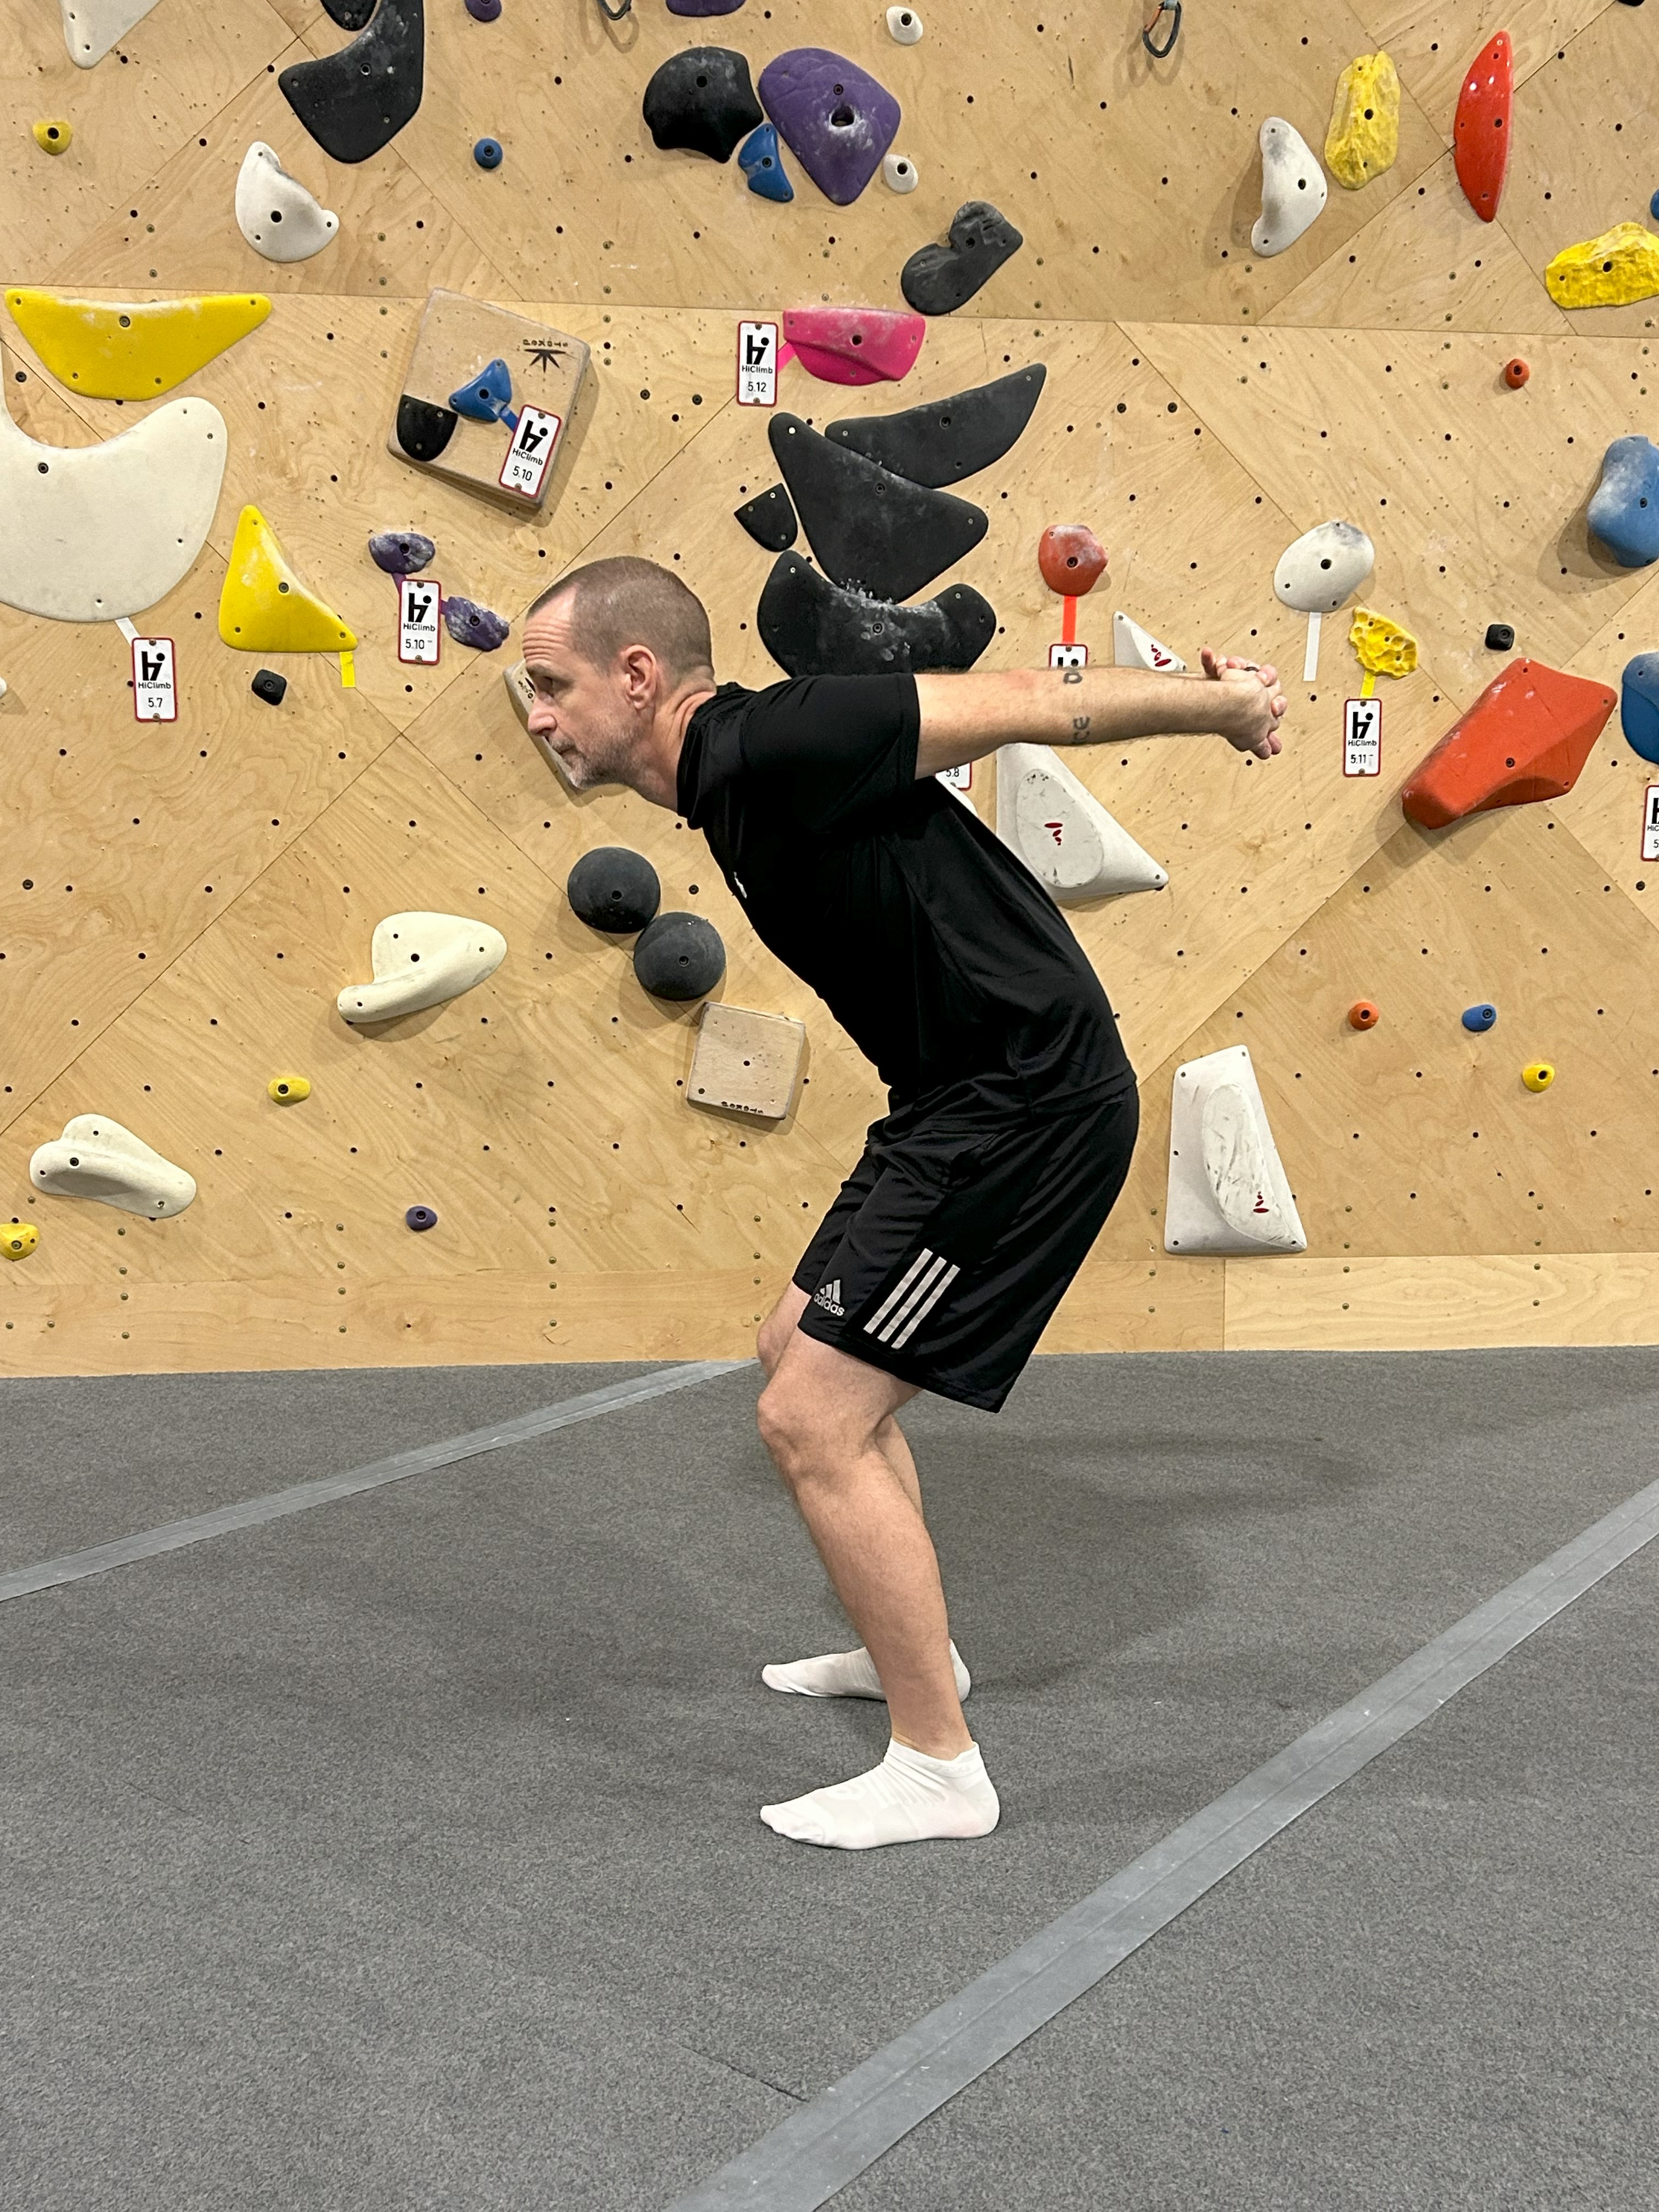
Flag – Extend one arm out diagonally upwards while extending the opposite leg out diagonally downwards. Do this for both sides.
Reverse outside flag – Extend one arm out diagonally upwards while extending the same side’s leg behind your body and in the opposite direction of your arm. Do this for both sides.
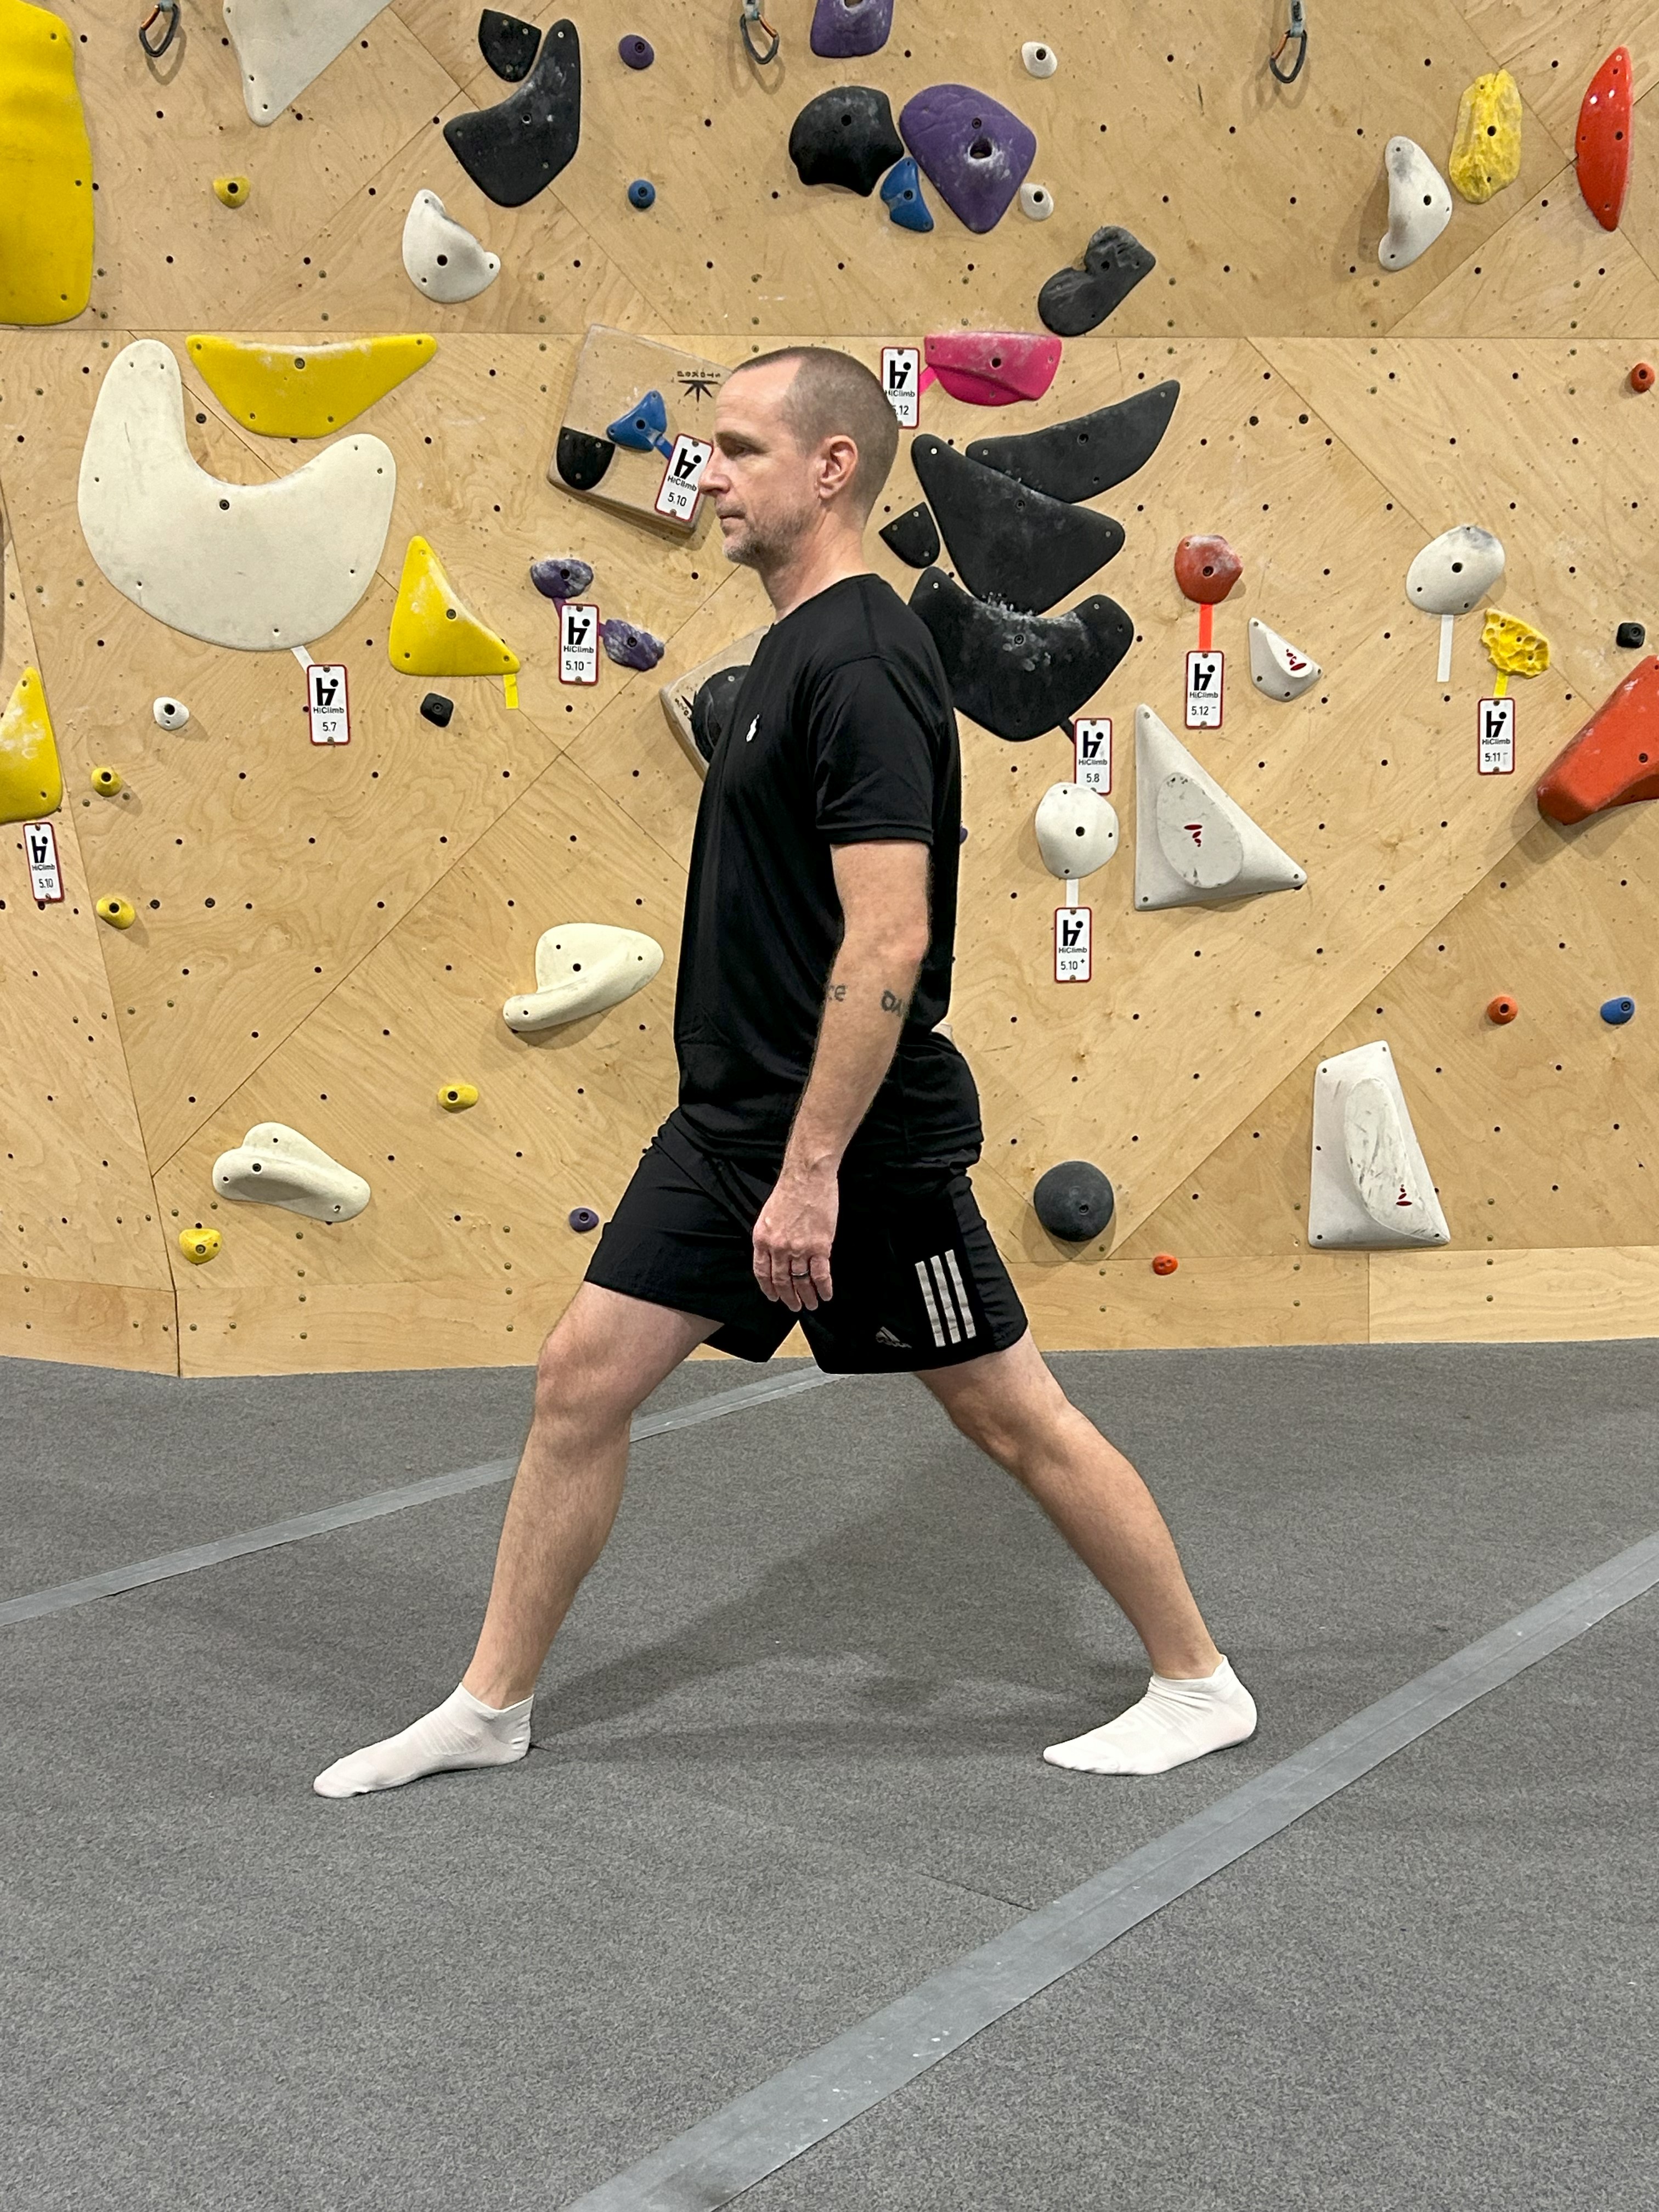
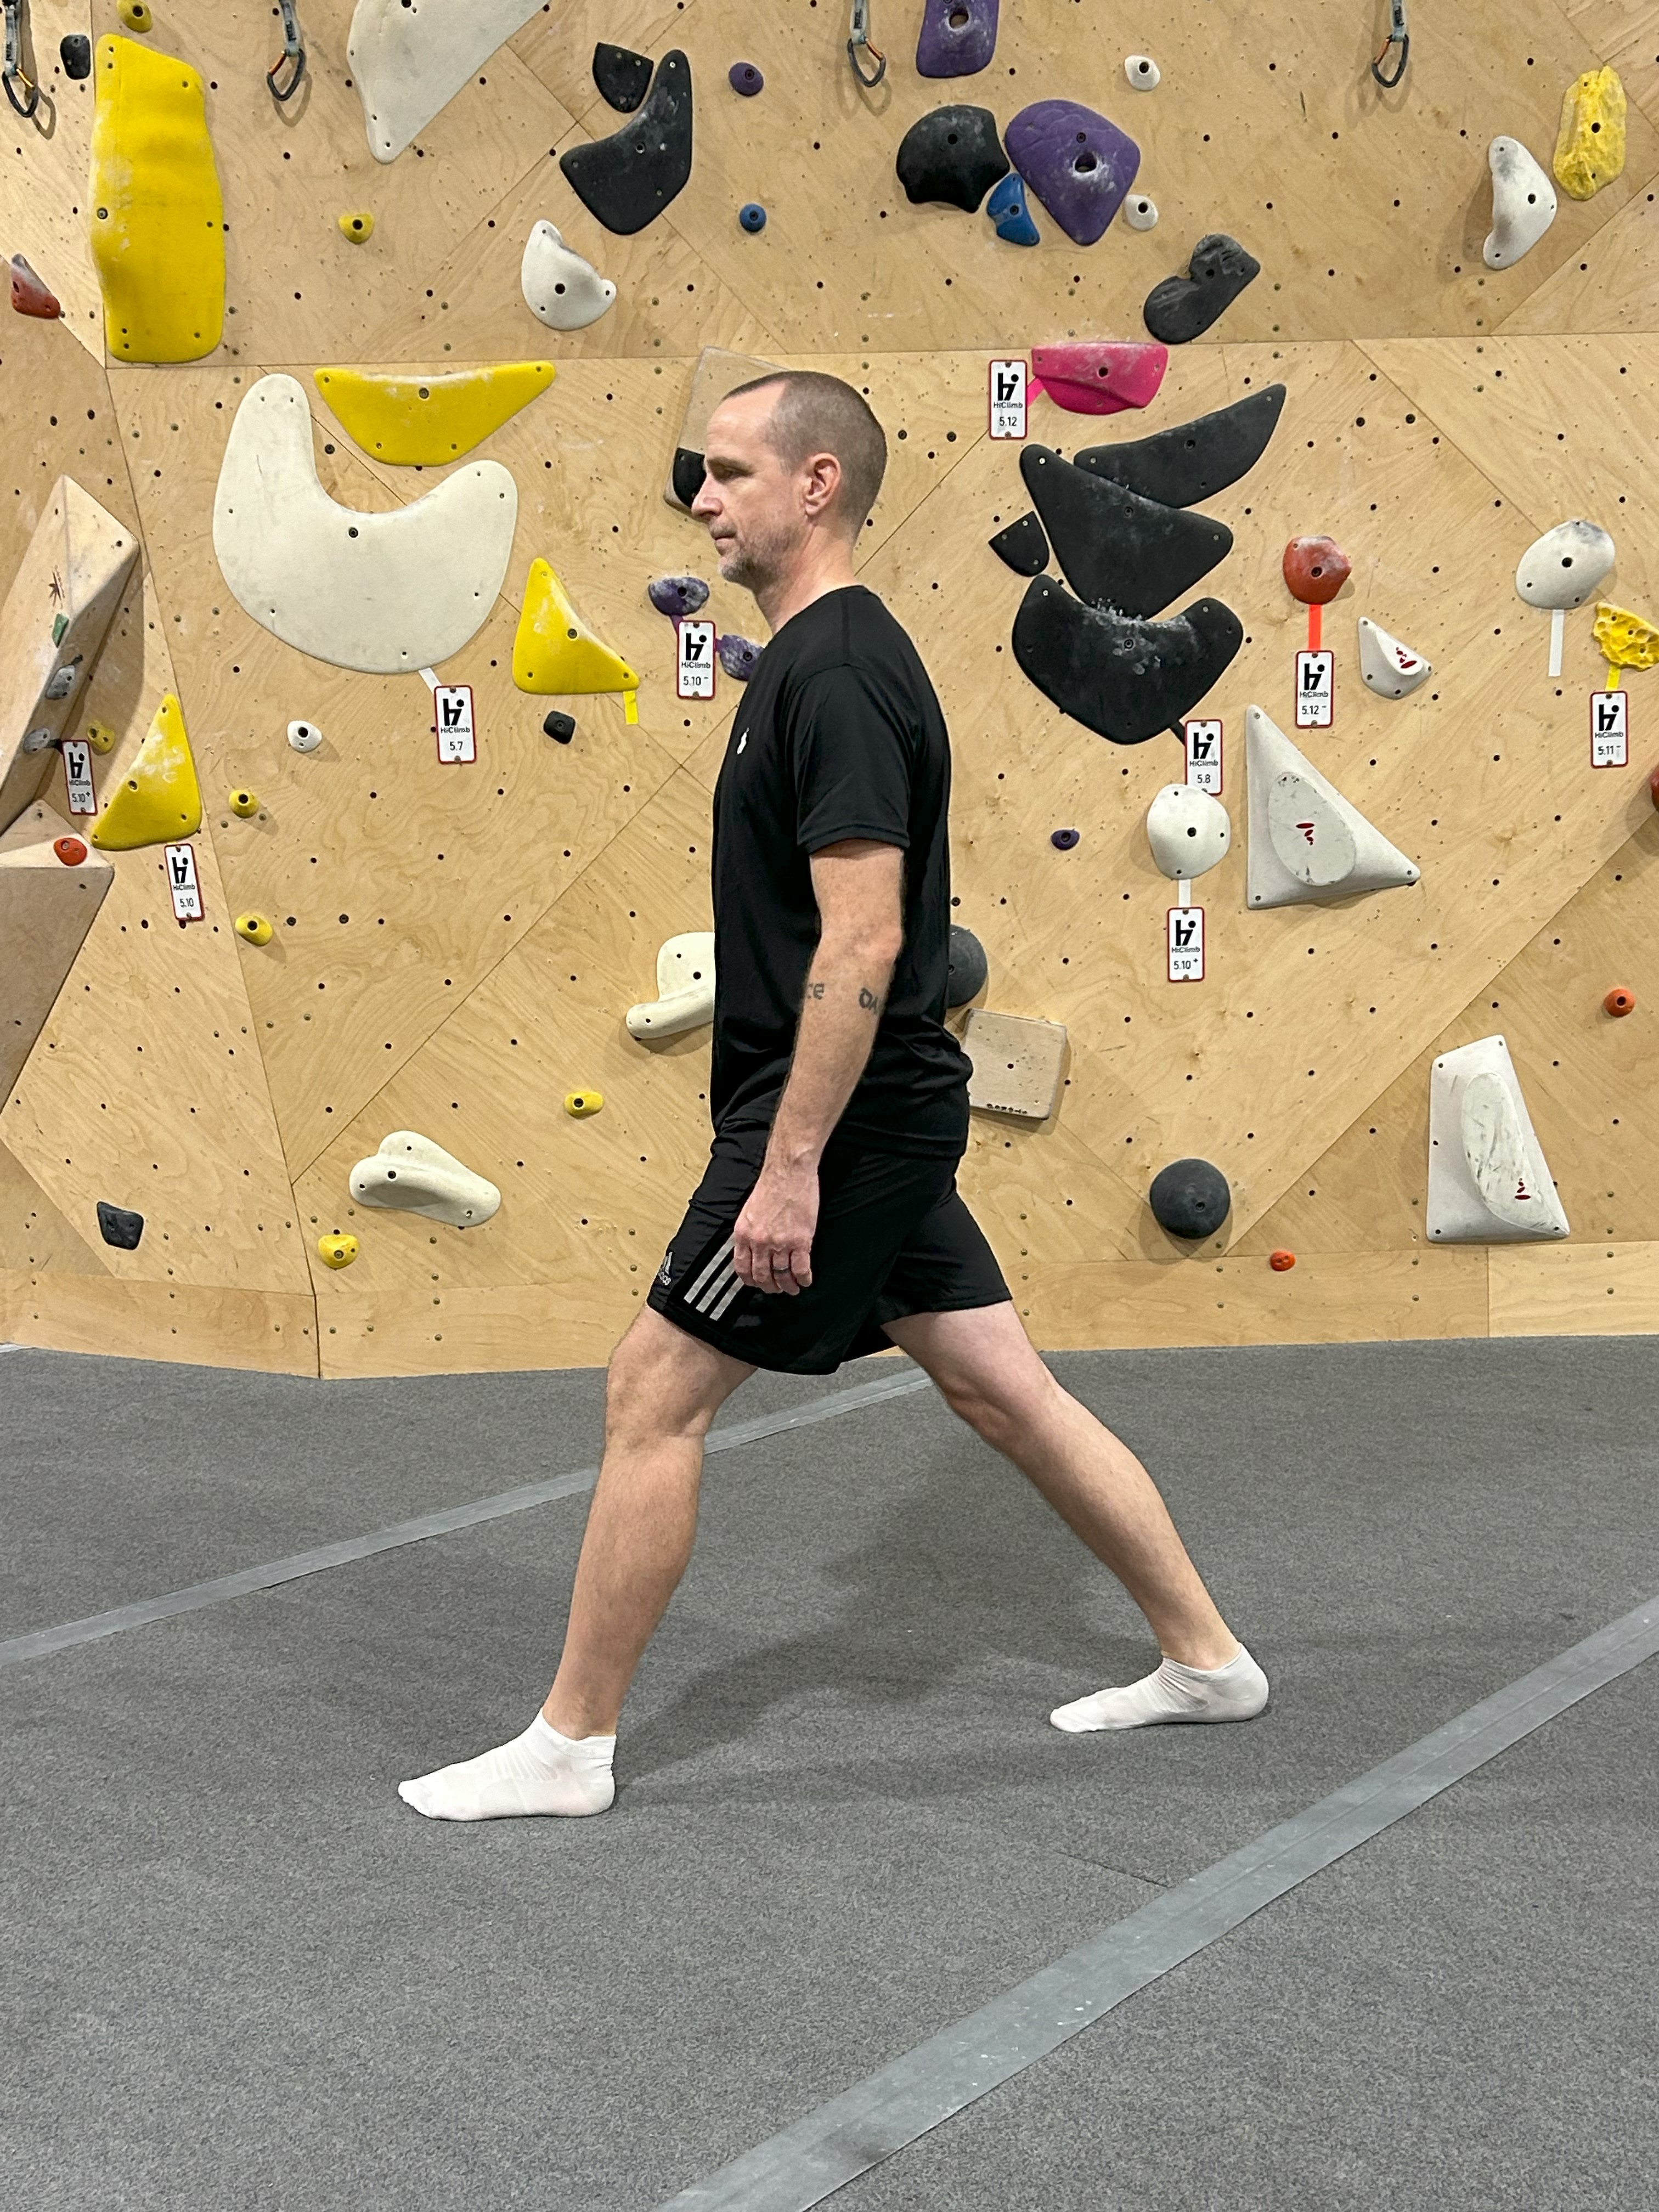
Lunge with rotation – Put one leg in front of your body and rotate towards that leg with the opposite arm bent in front of you. At the end of the rotation, extend your other arm upwards over your head until it reaches your face. Do this for both sides.
High step – Using your hands, bring one knee up towards your chest and then let it down. Do this for both sides.
Arm rotations – Extend your arms outwards and rotate them in circles. Do both rotation directions.
Hip rotations – Place your hands on your hips and rotate your hips in circles. Do both rotation directions.
Knee rotations – Bend your knees and place your hands on them. Rotate your knees in circles. Do both rotation directions.
Sun salute (chest) – Put your hands together in front of your chest. Then bring your arms up and extend them outwards while pushing your shoulders away from your chest.
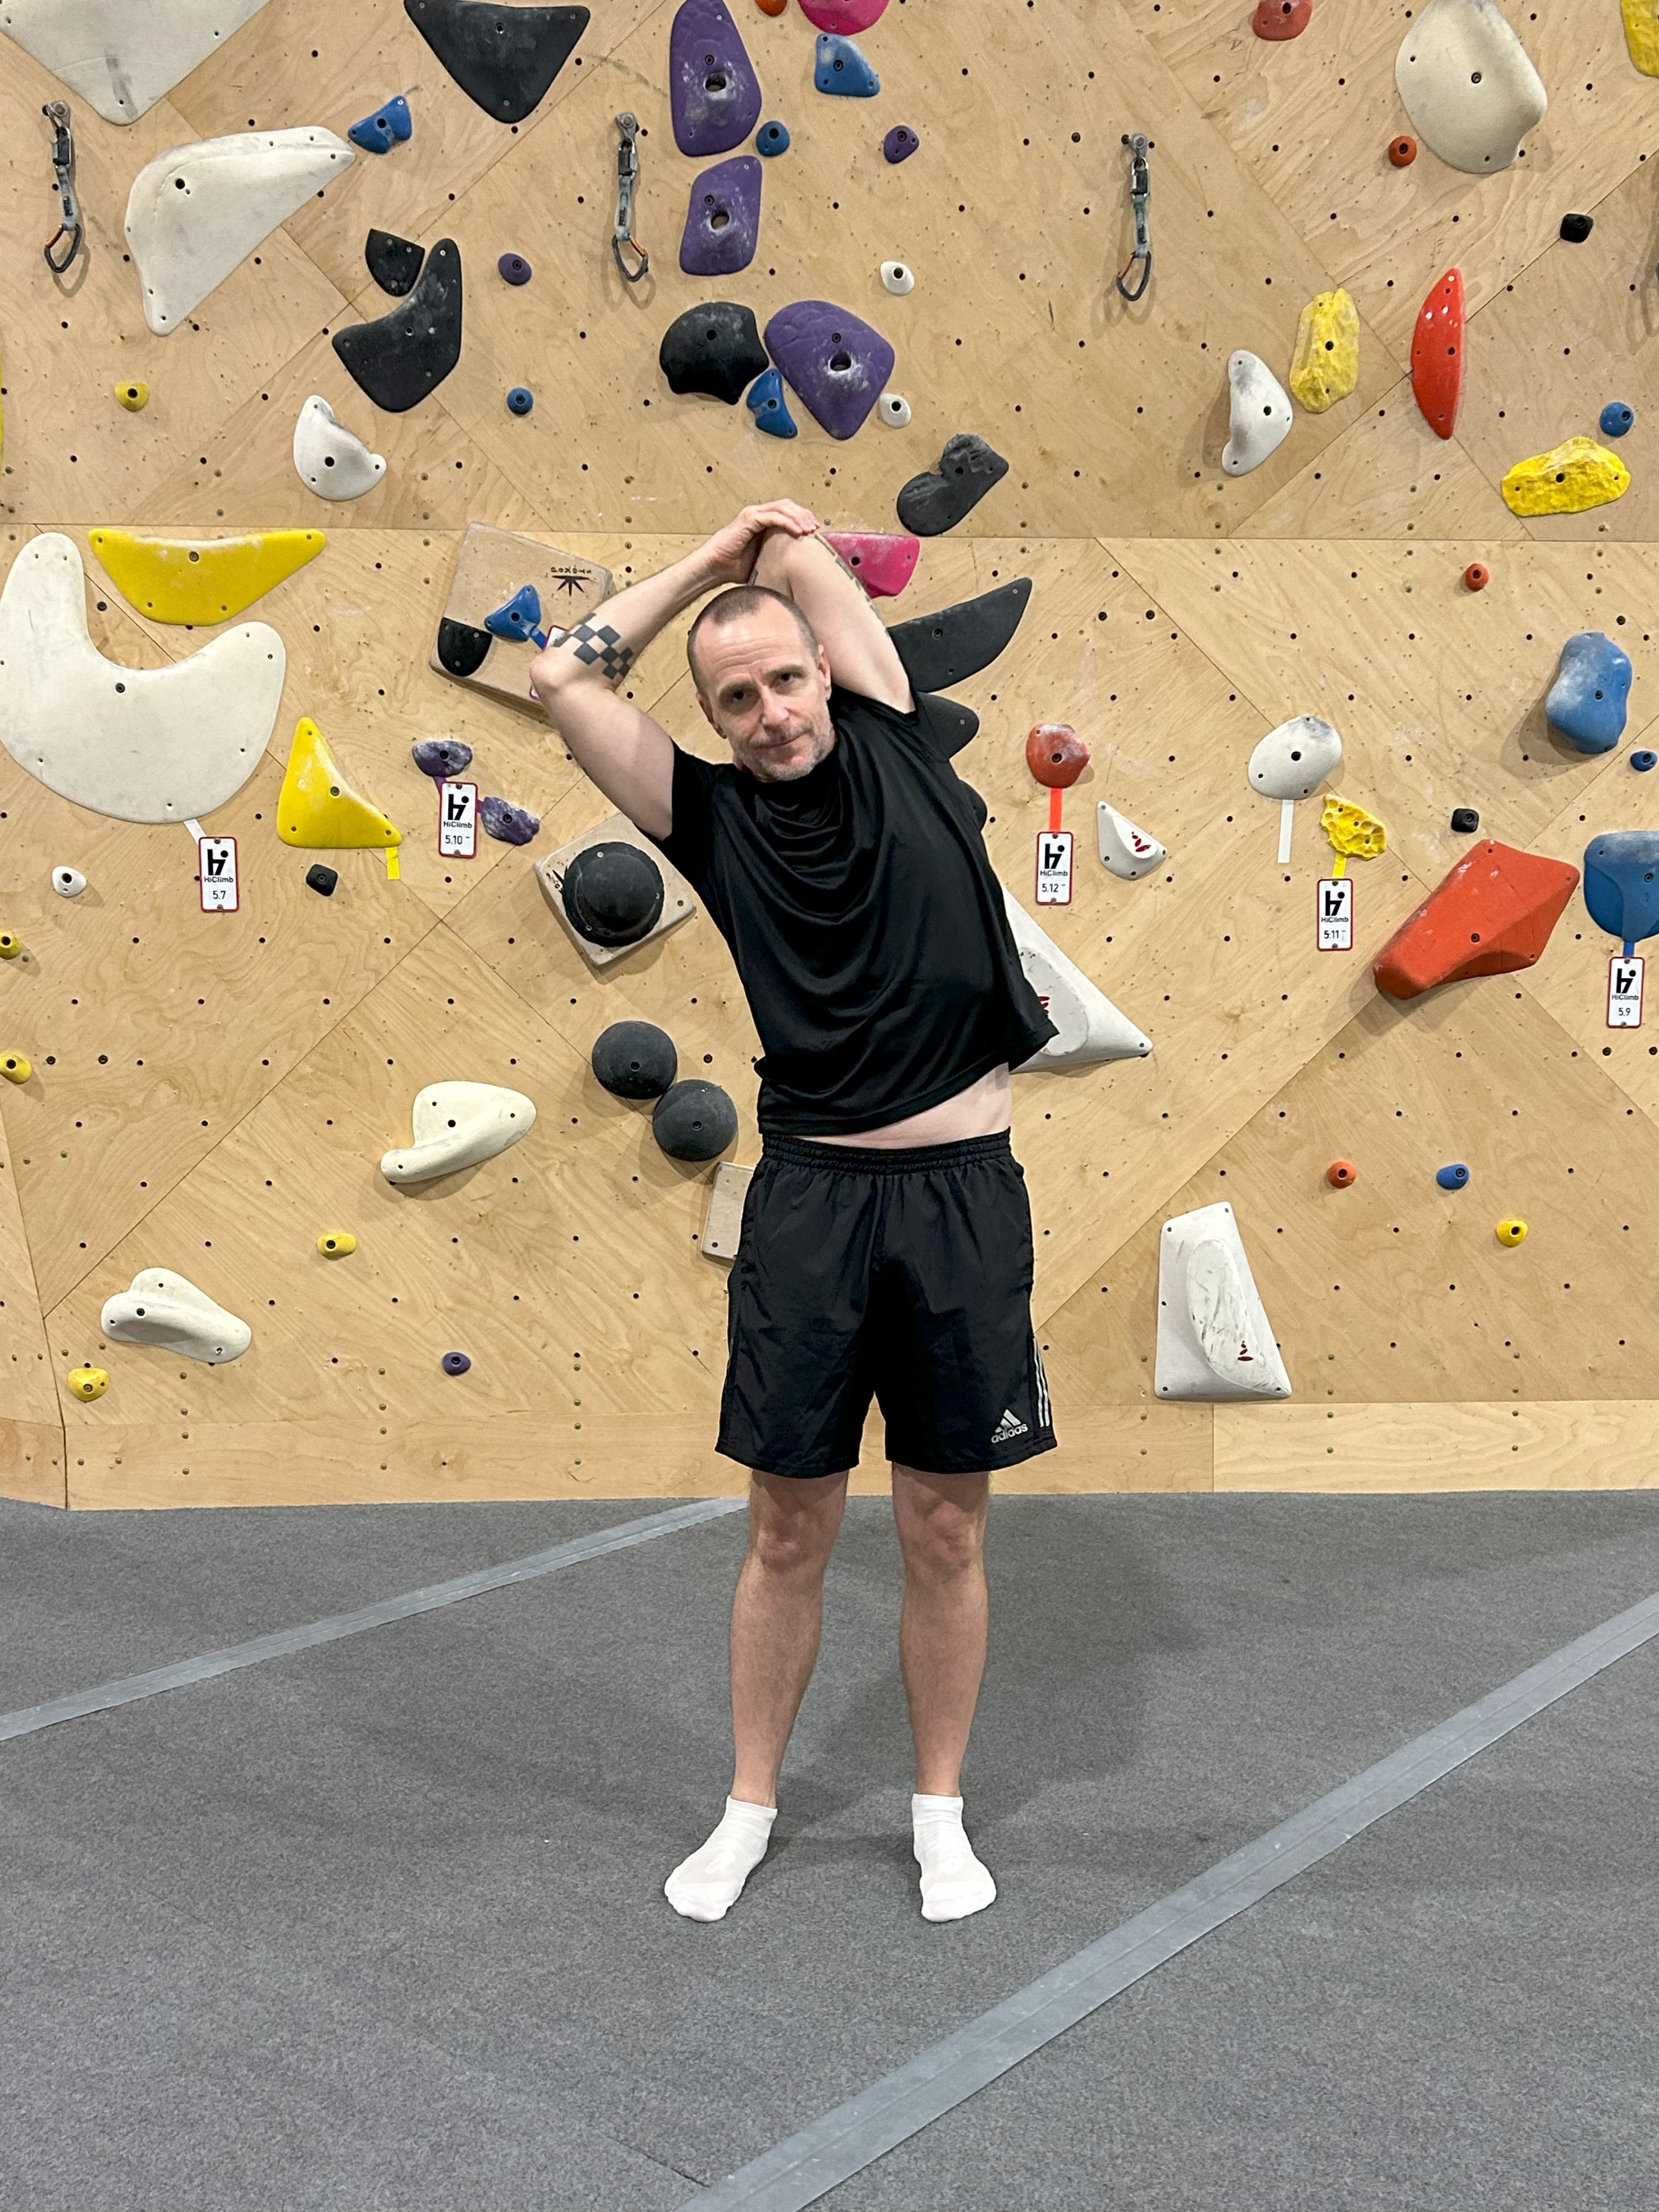
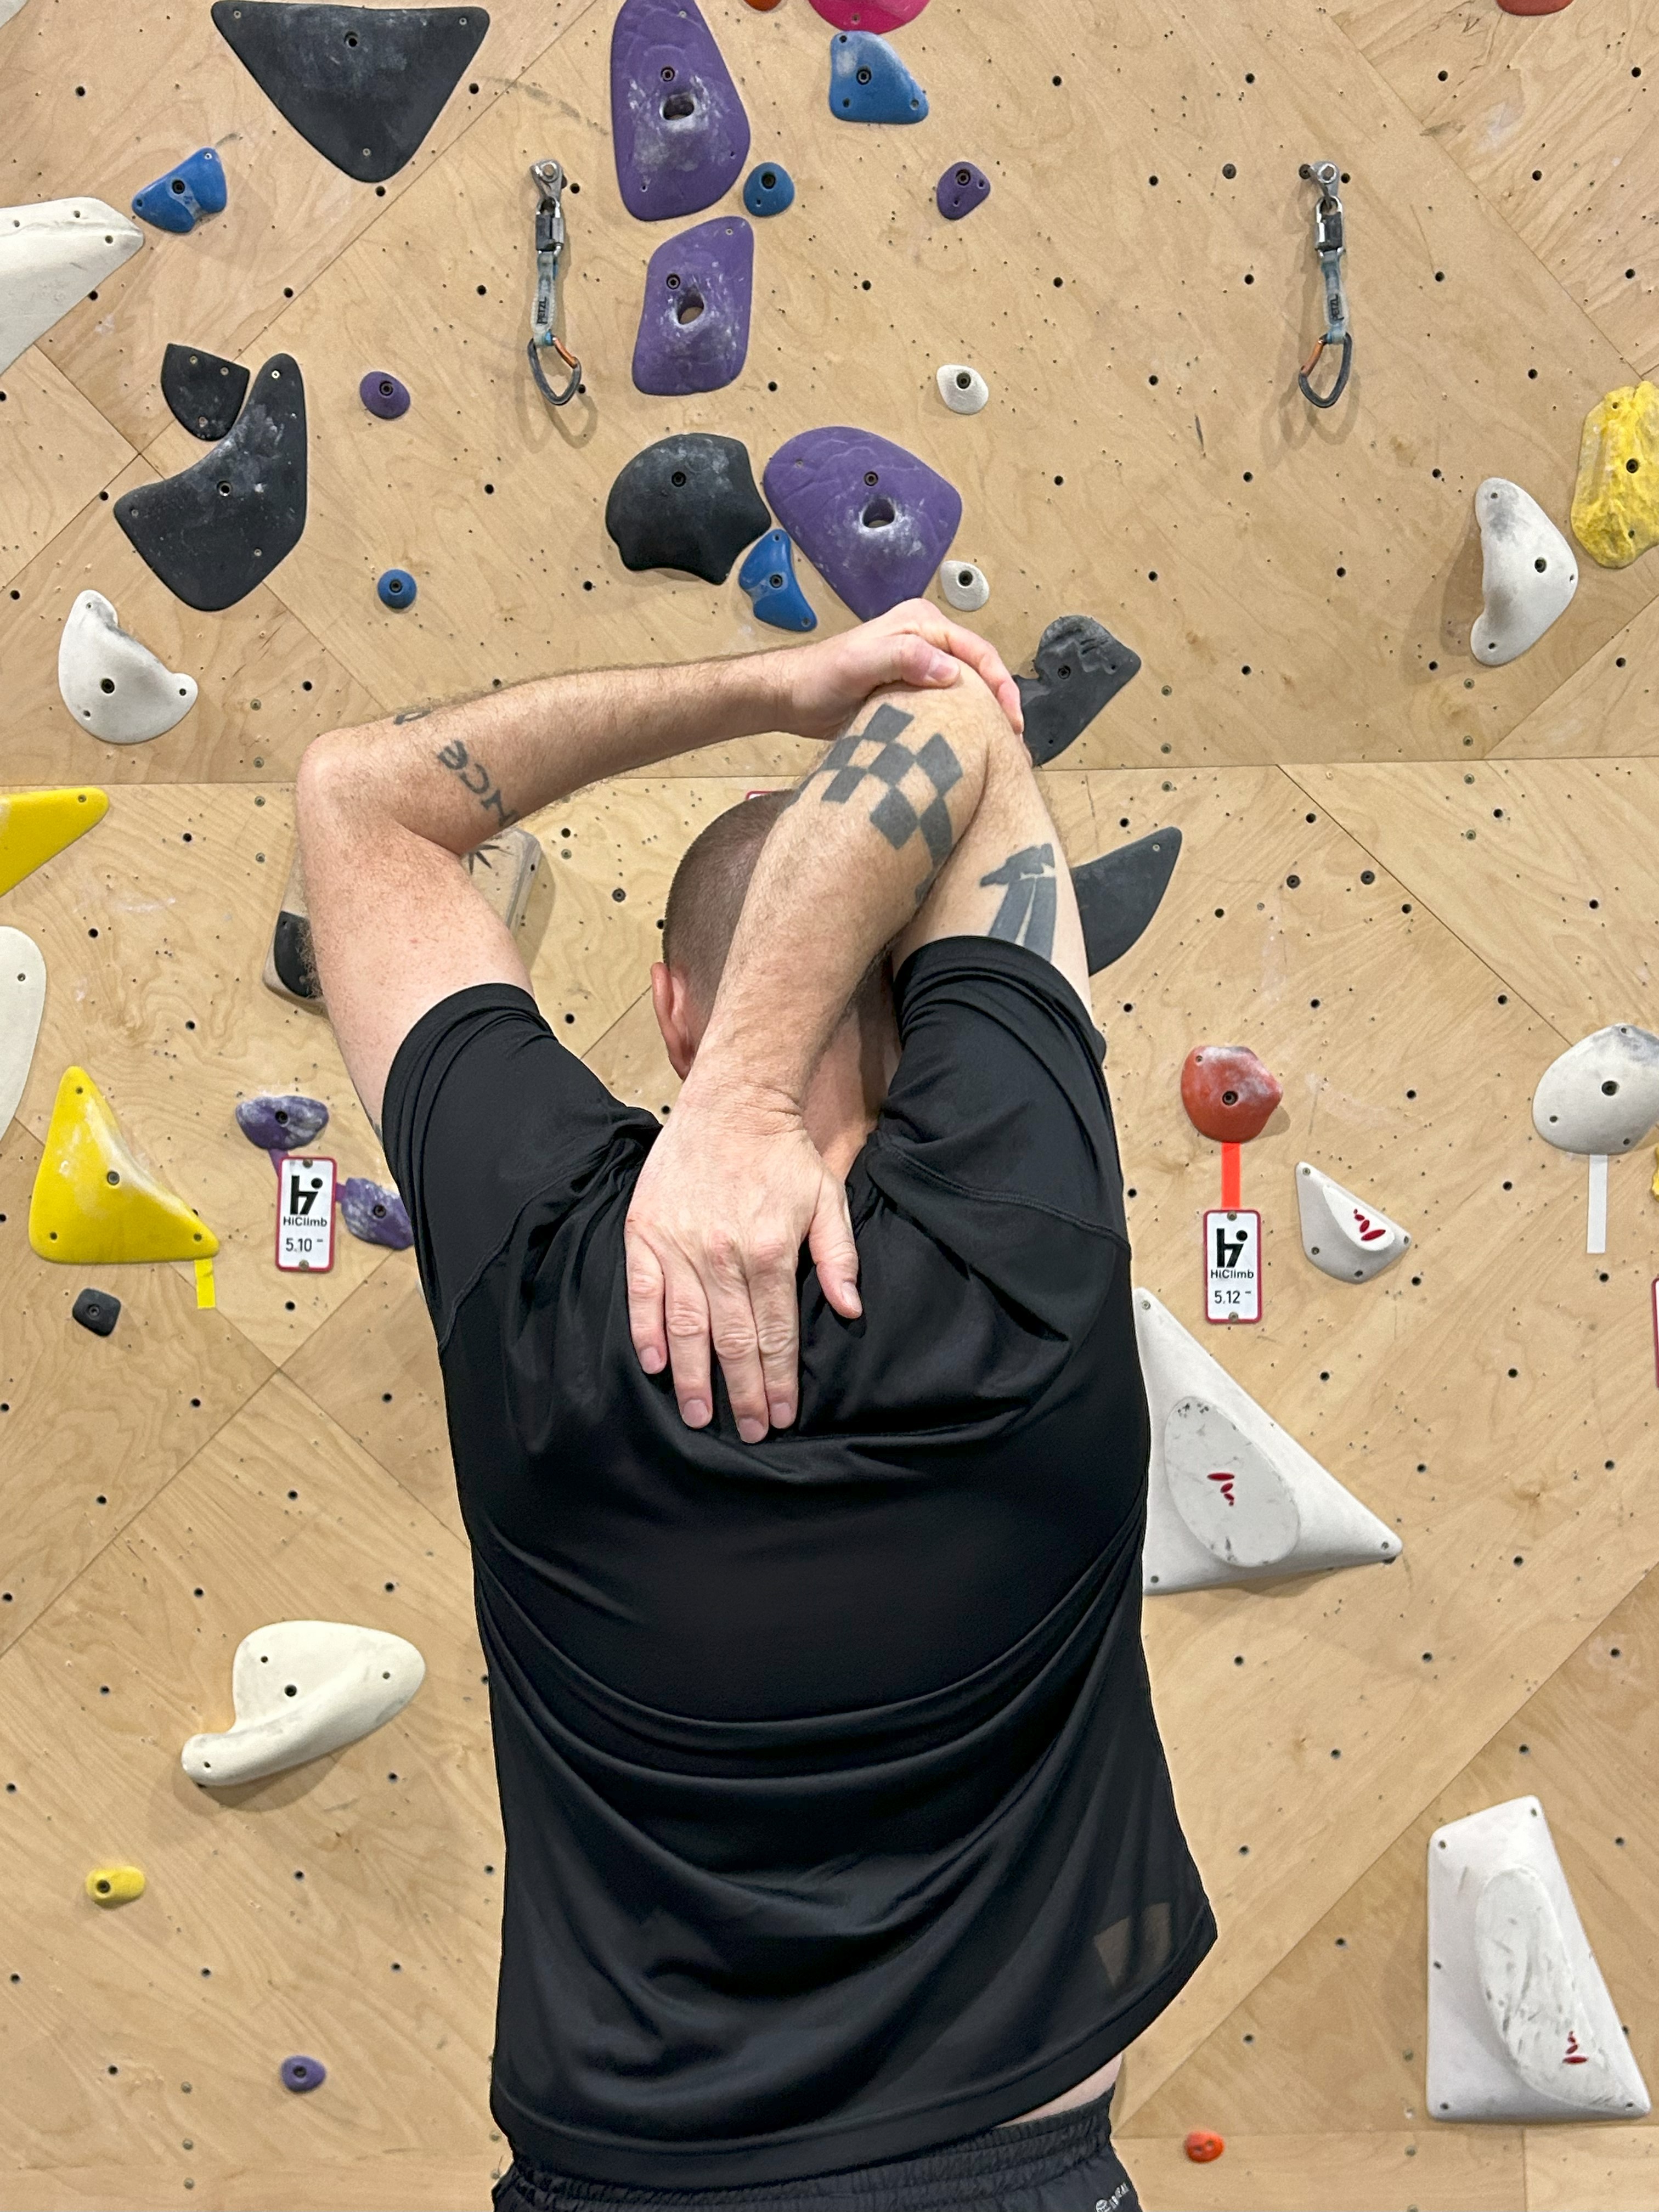
Cross body reach (shoulder and chest) – Bend one arm and place the other arm across the socket of the first arm. While keeping the arm in the socket fully extended, bring that arm from the starting position to behind your body. Once your arm is behind your body, do this same motion in the opposite direction until your arm is placed in the socket again. Do this for both sides.
Shoulder blade taps (triceps and biceps) – Bring your arms up and tap your shoulder blades with your hands. Then move your hands back down and bring them behind your body.
Wrist tendon glides – Alternate between bending and extending your arms as well as bending your wrists up or down. You can choose the direction of your arms based on the general movement of a climb you plan to do.
Finger tendon glides – Start with your fingers extended, then slowly bend them down into the palm. Once your fingers reach the palm, straighten out the top half of your finger and push down into the palm. Afterwards, do this motion in the opposite direction.
Static Stretches
Each of the stretches below should be done for about 10-20 seconds unless otherwise stated.
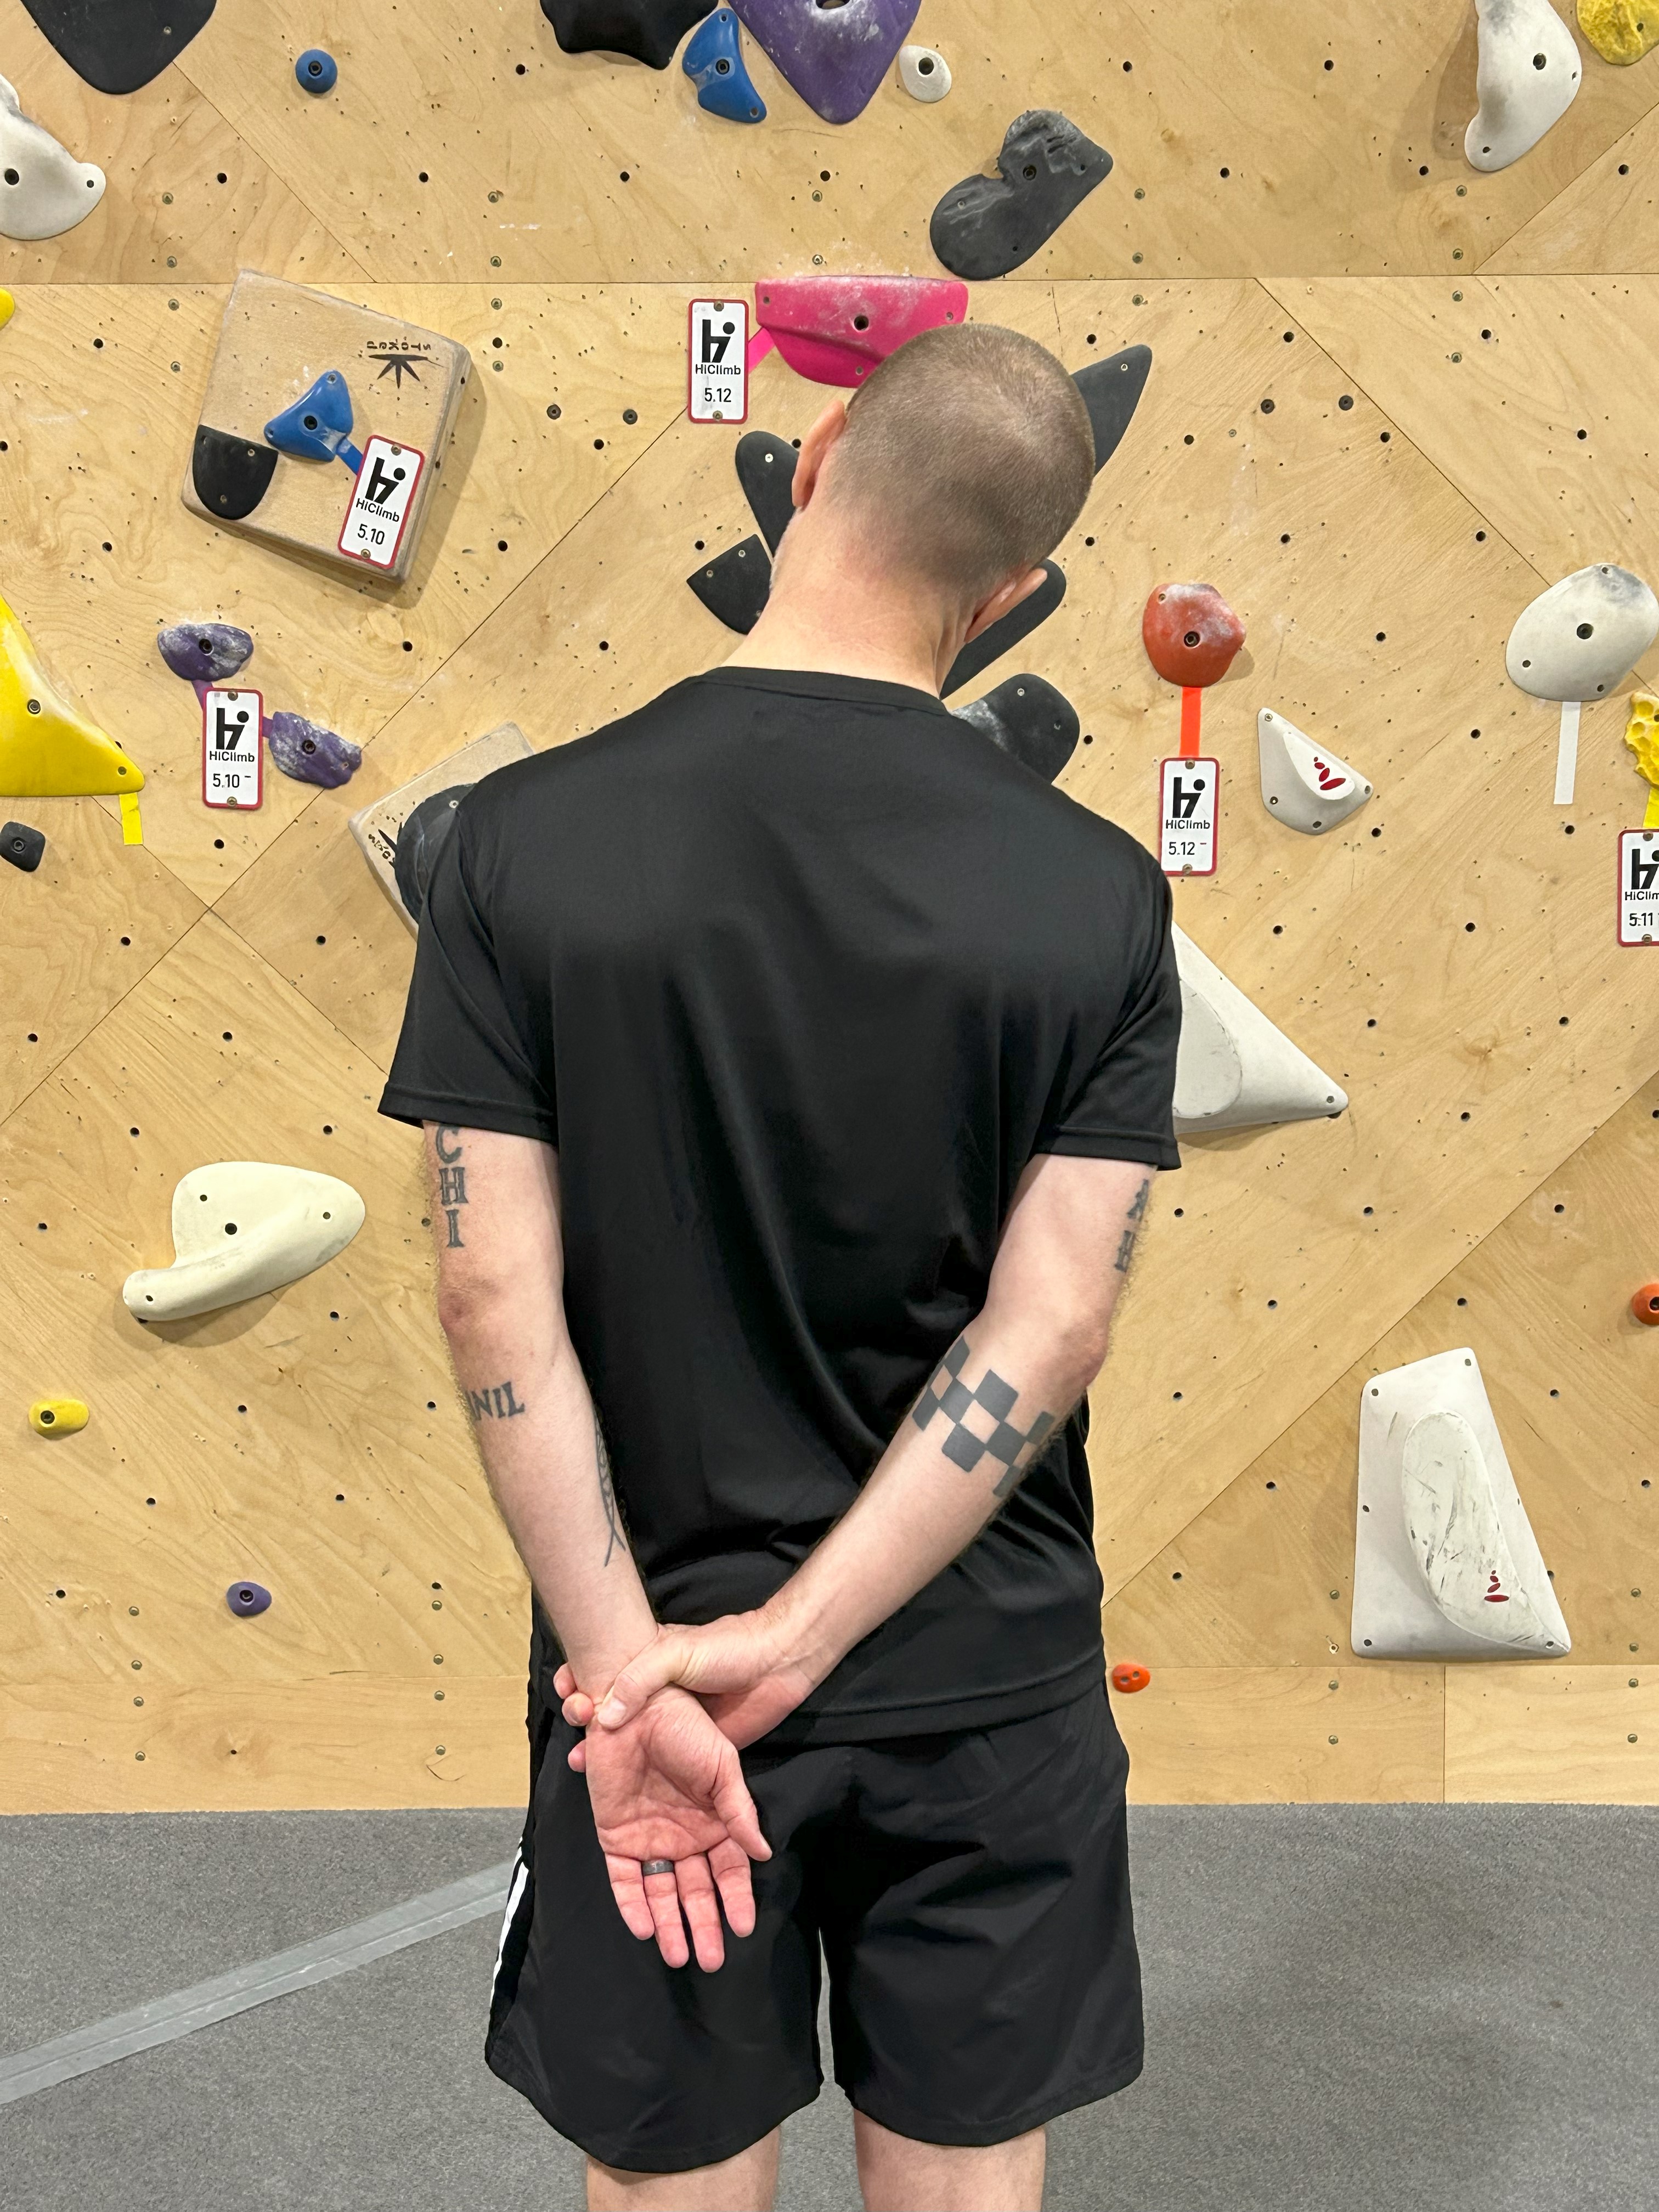
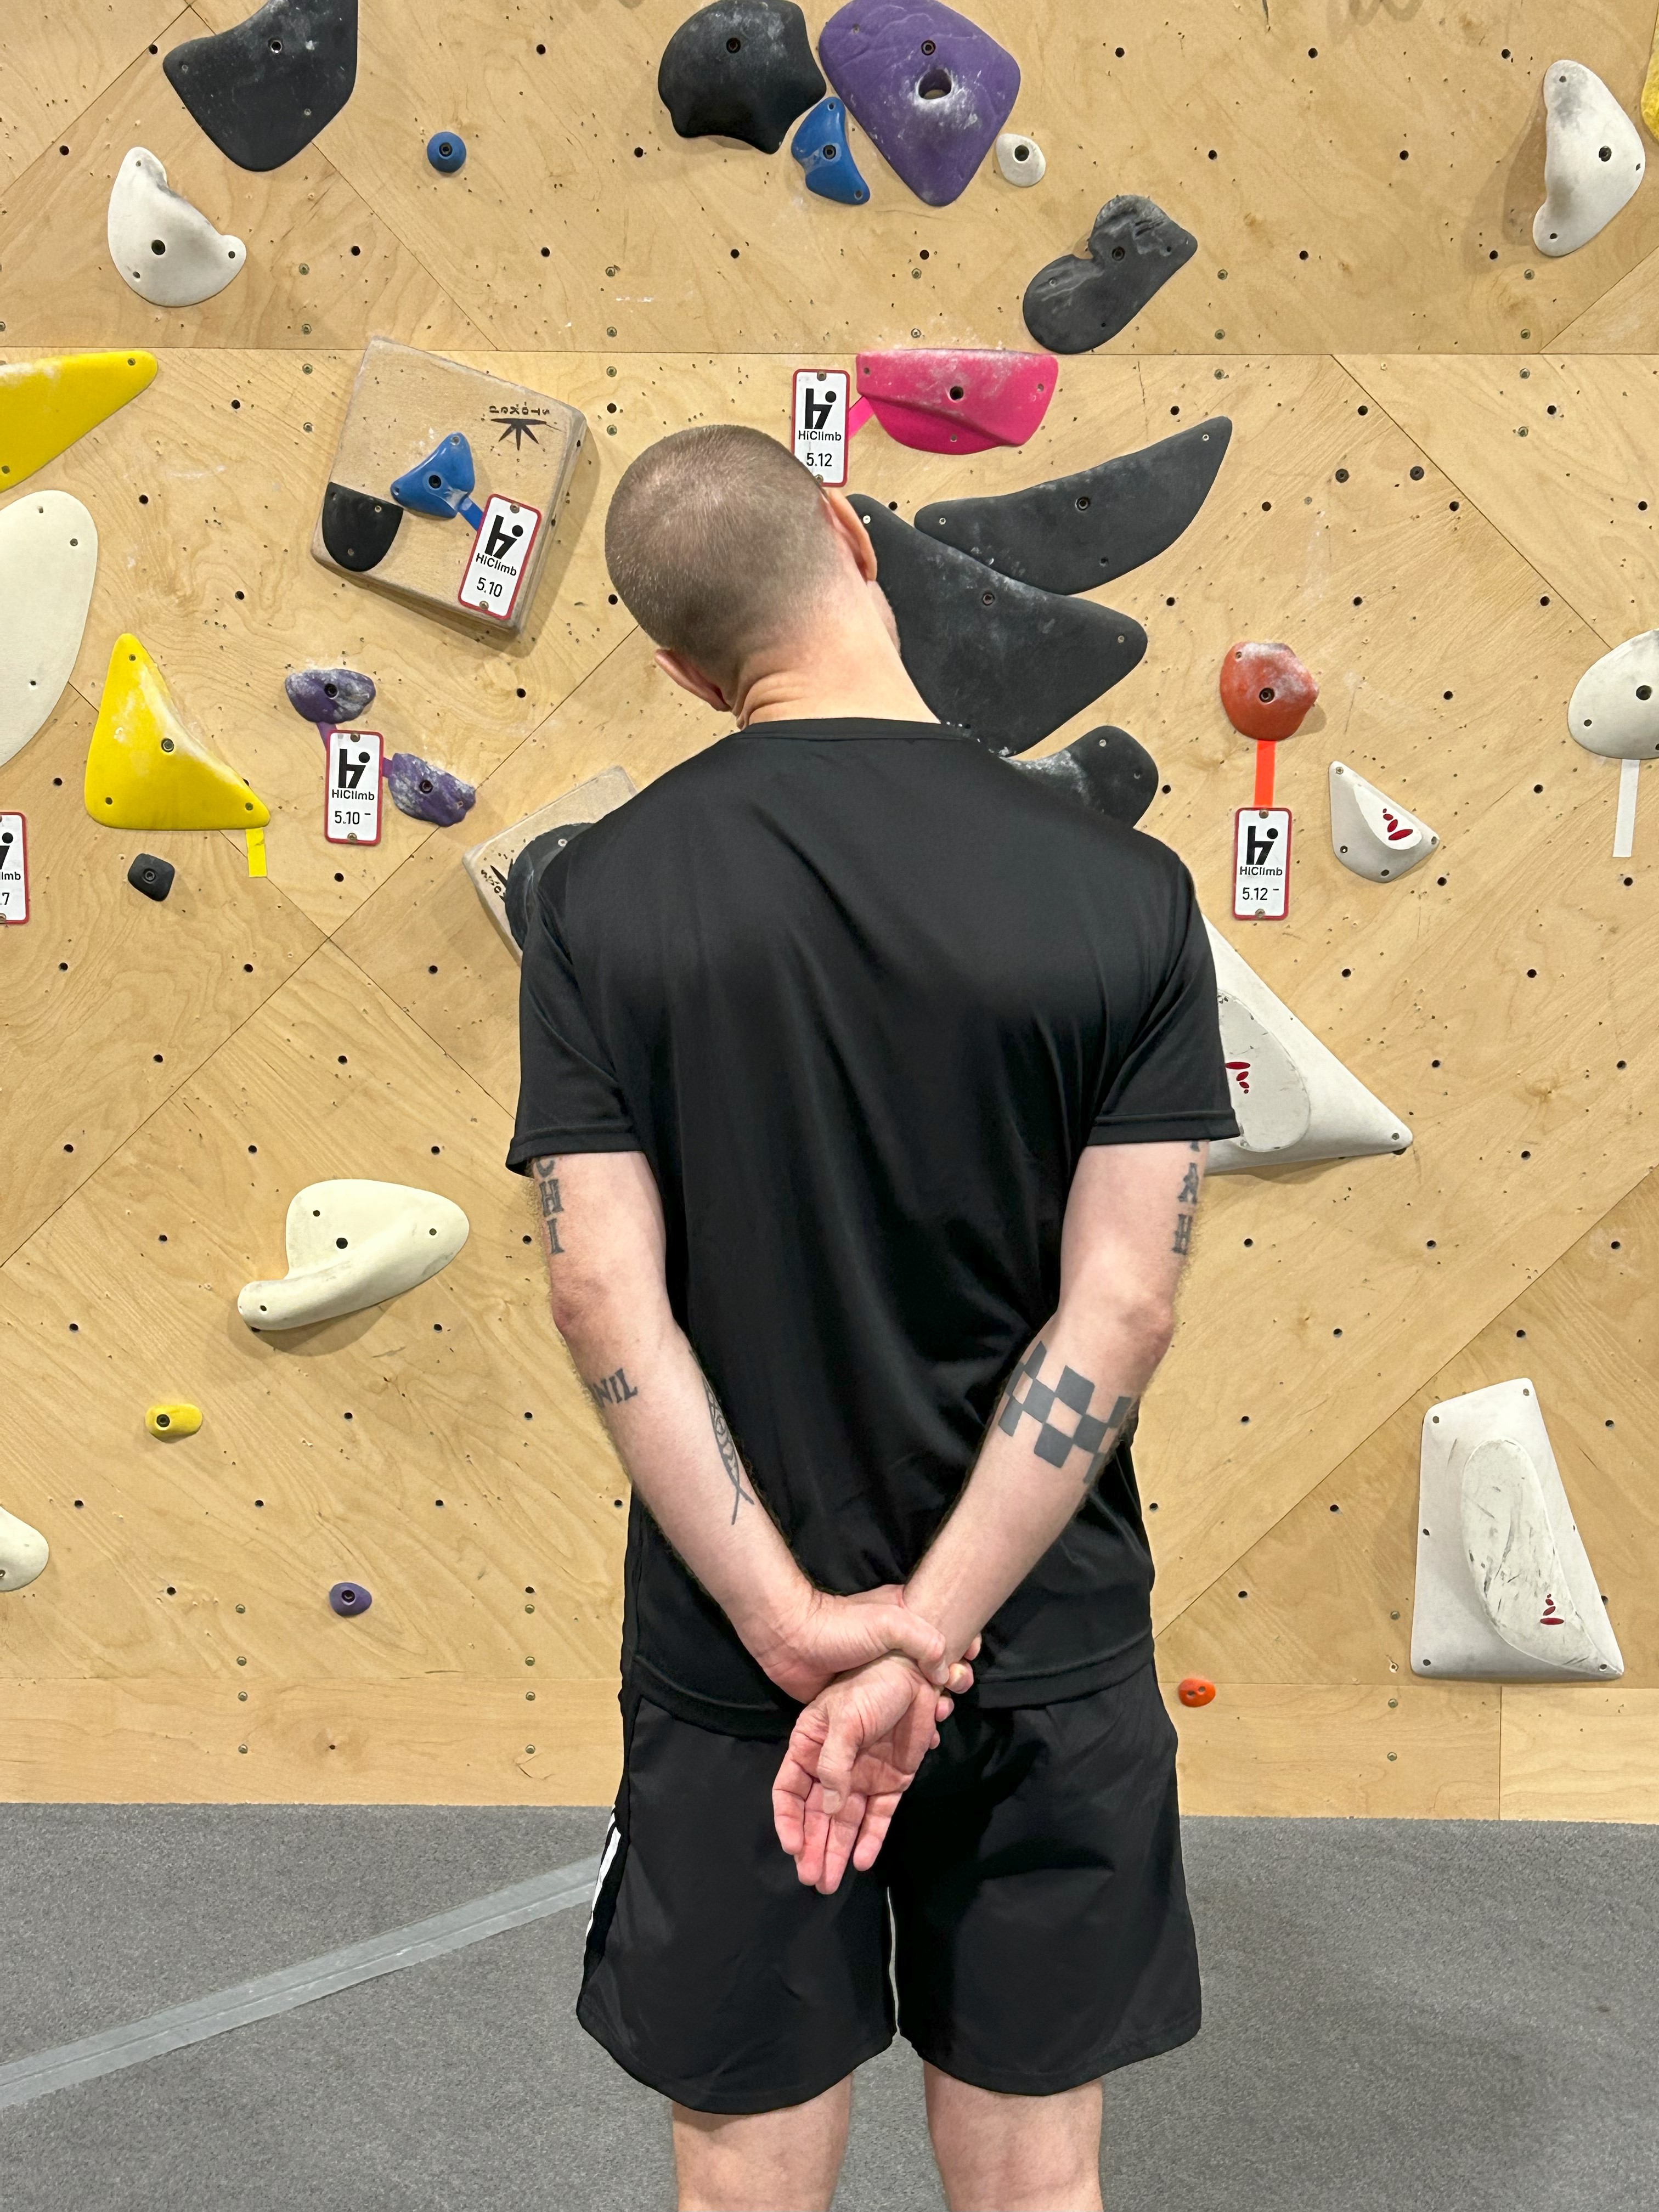
Neck – Tilt your neck while pulling one arm down behind your back. Do this for both sides.
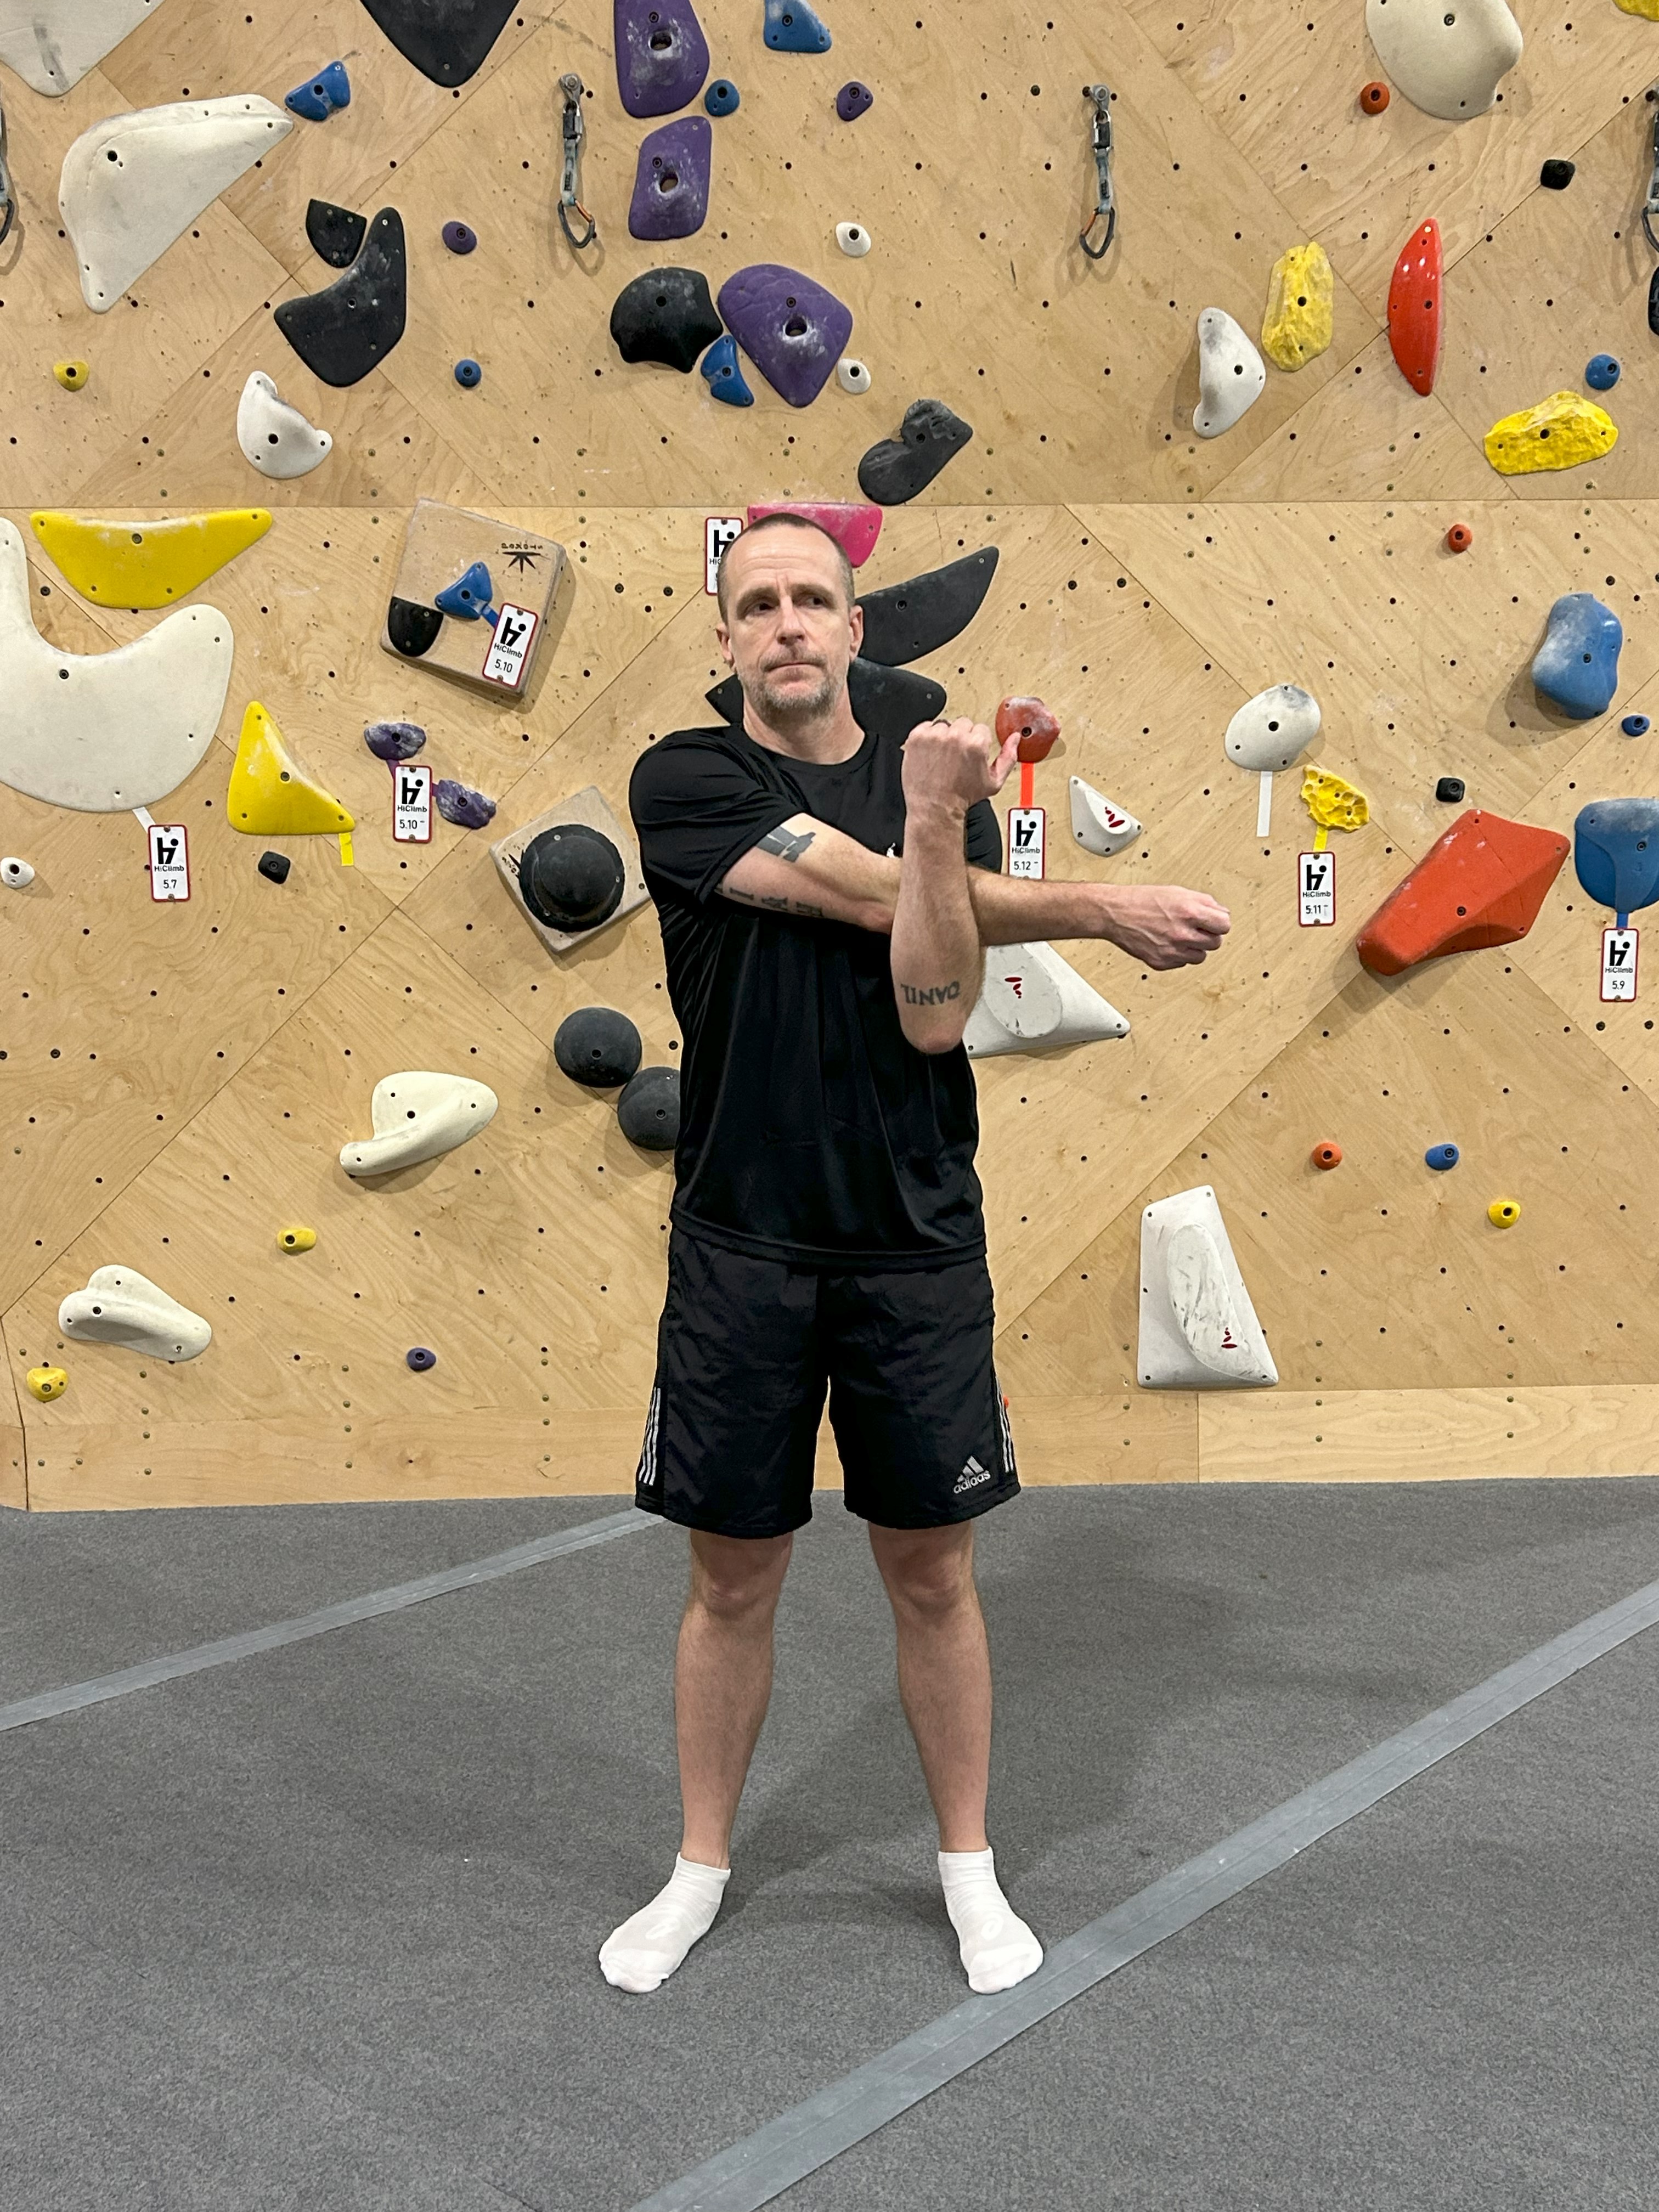
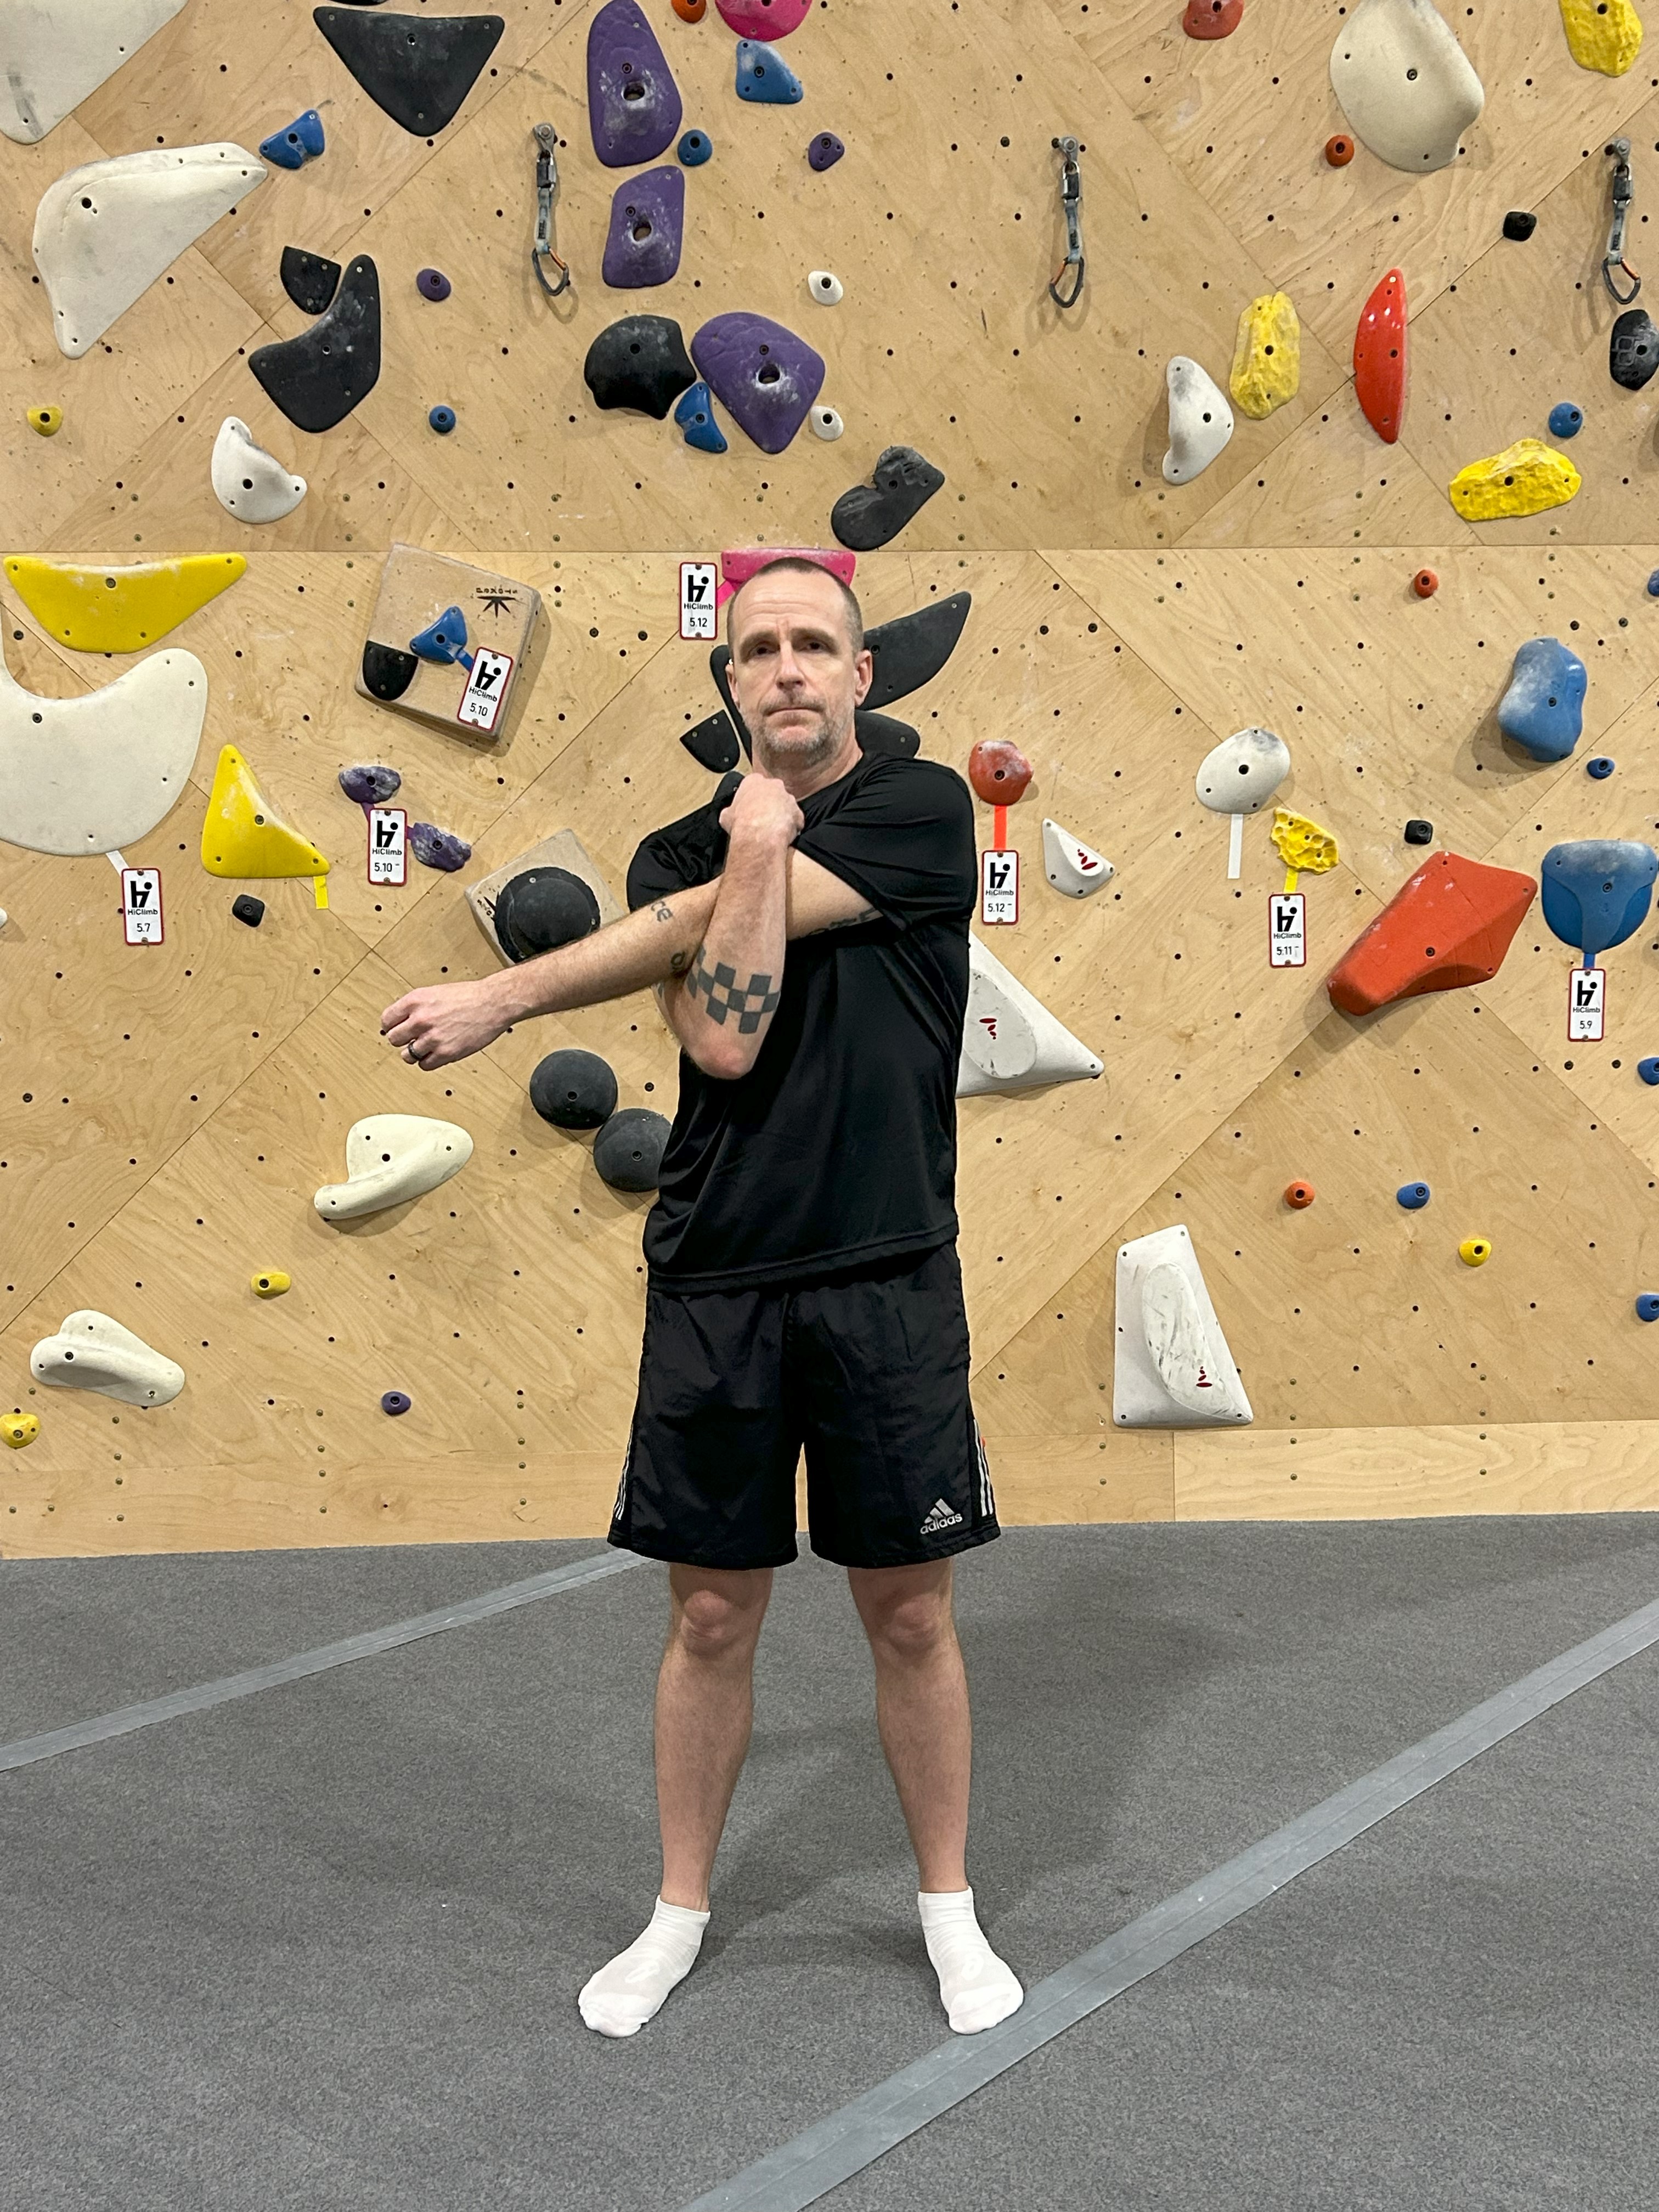
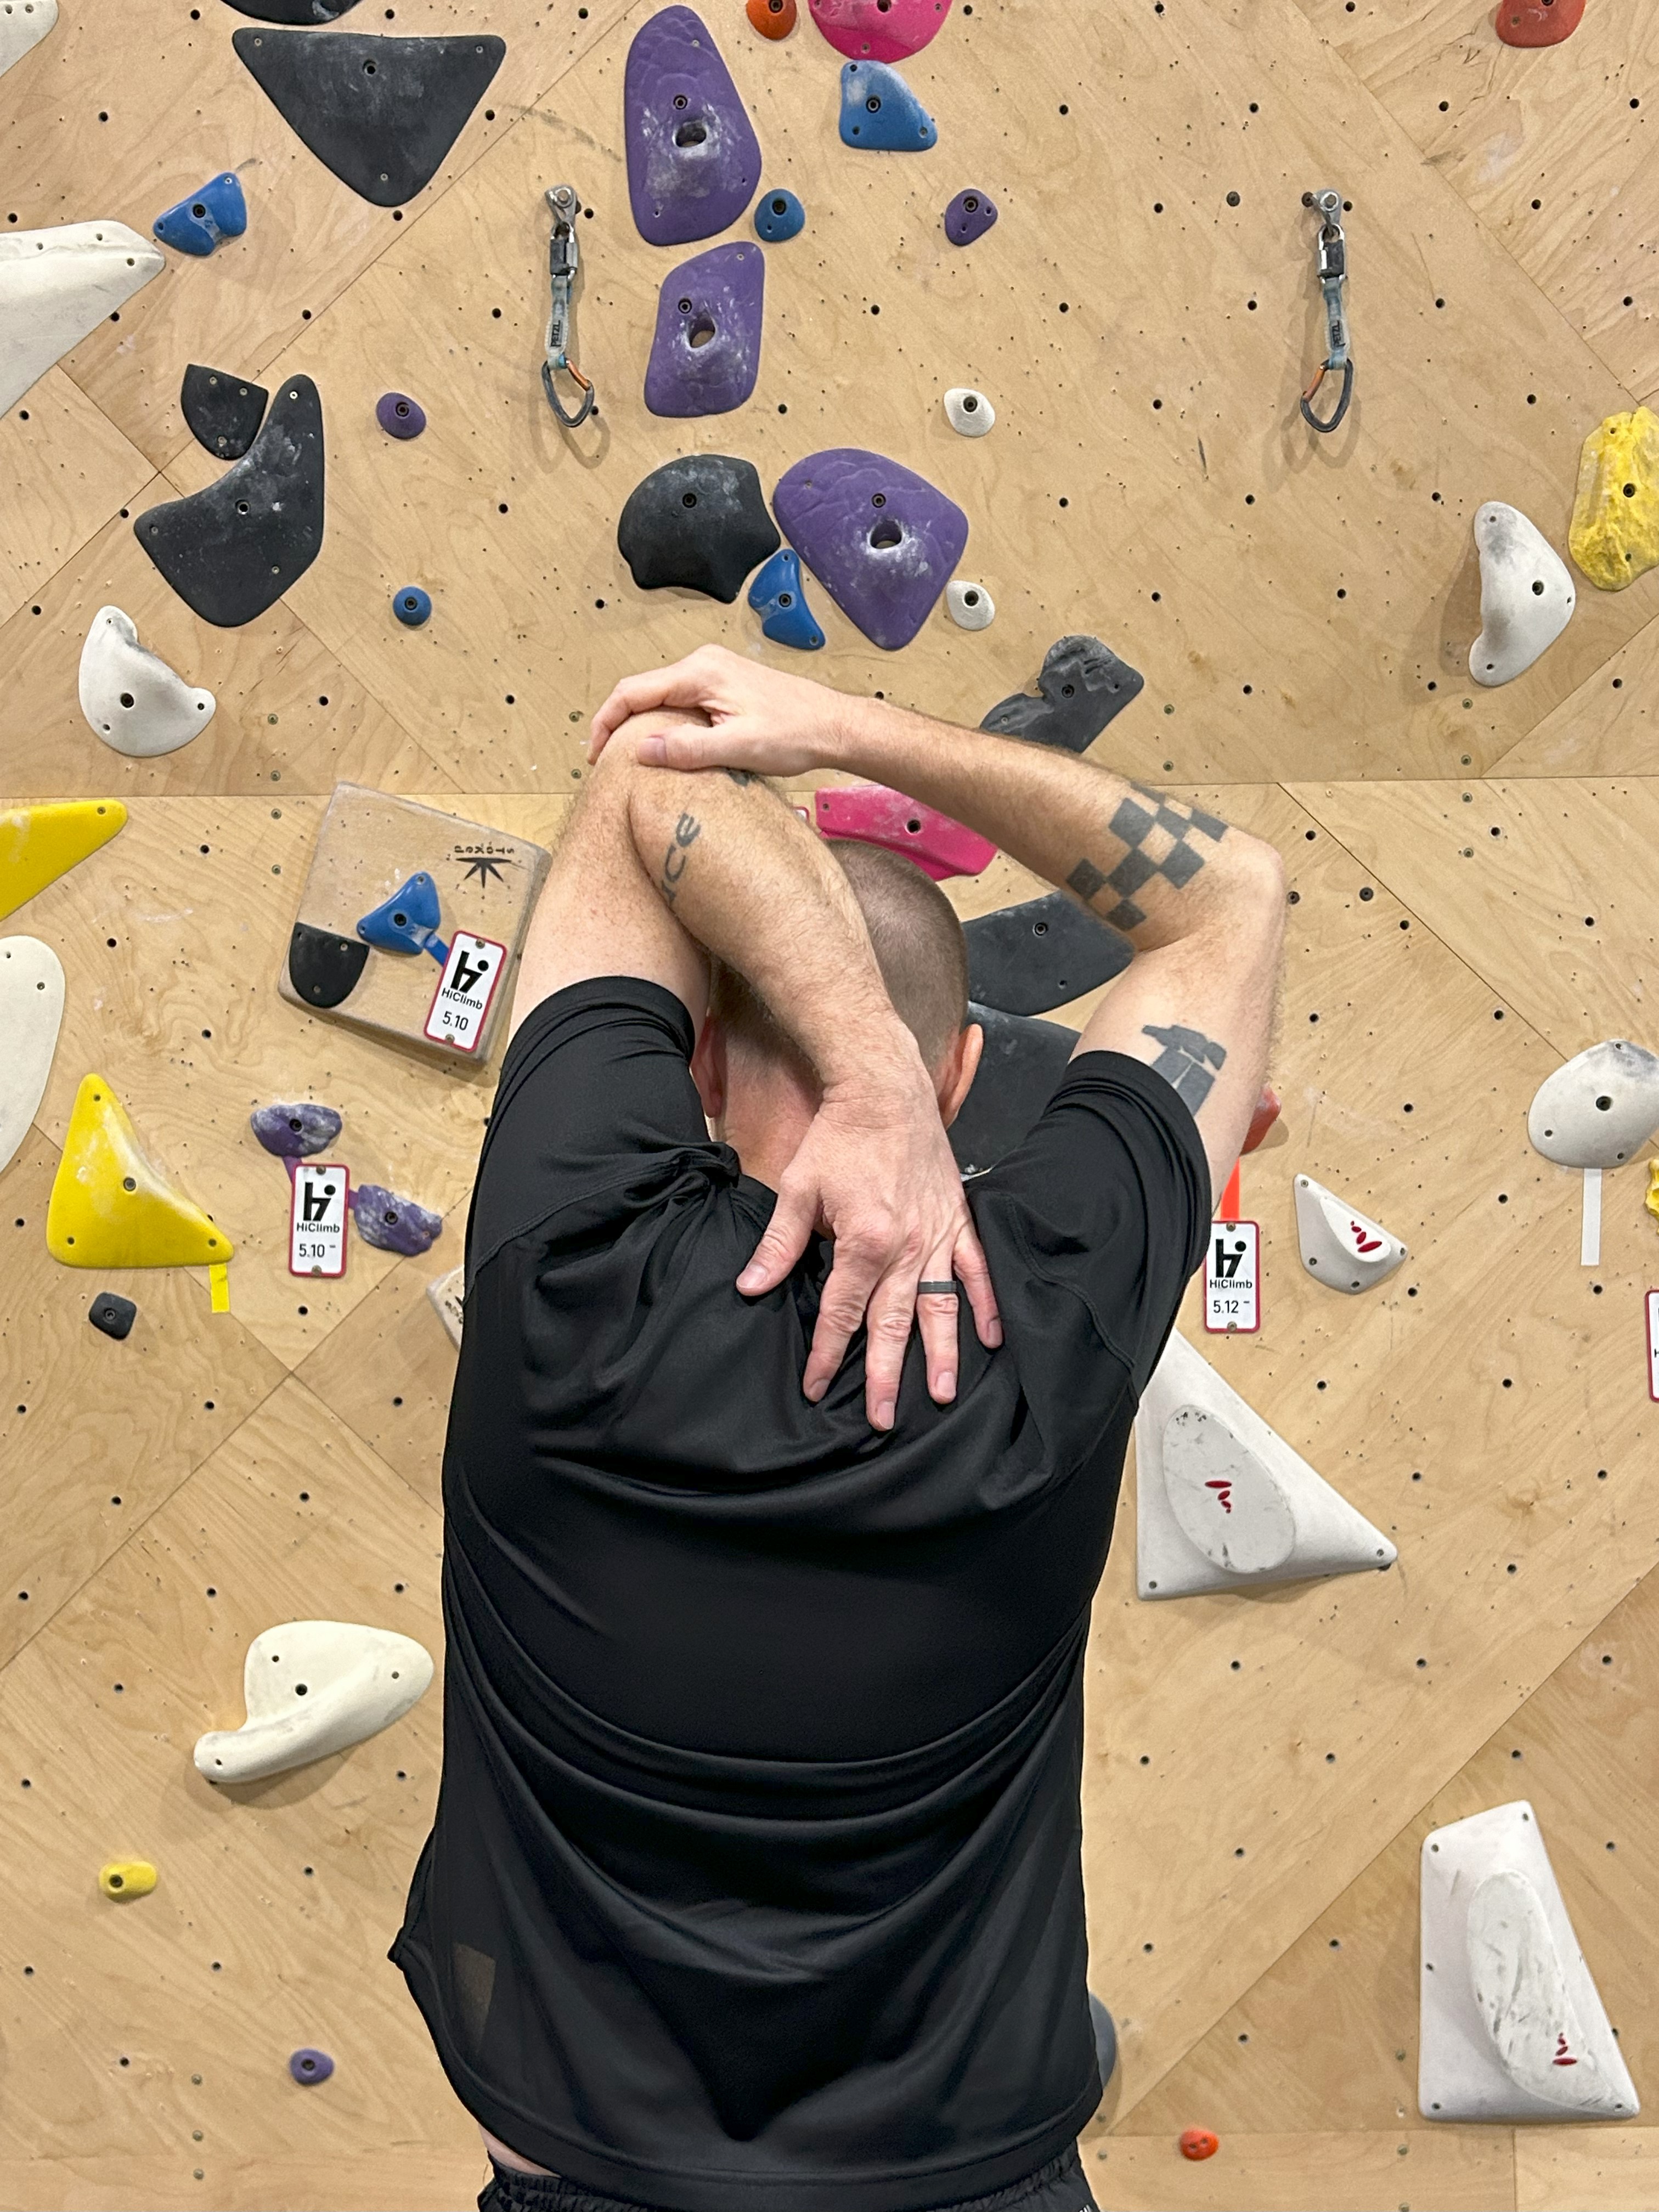
Shoulder – Bend one arm and place the other arm across the socket of the first arm. Pull the straight arm towards your body. Do this for both sides.
Chest – Bend your knees slightly and push your arms forward in front of you while your fingers are interlocked.
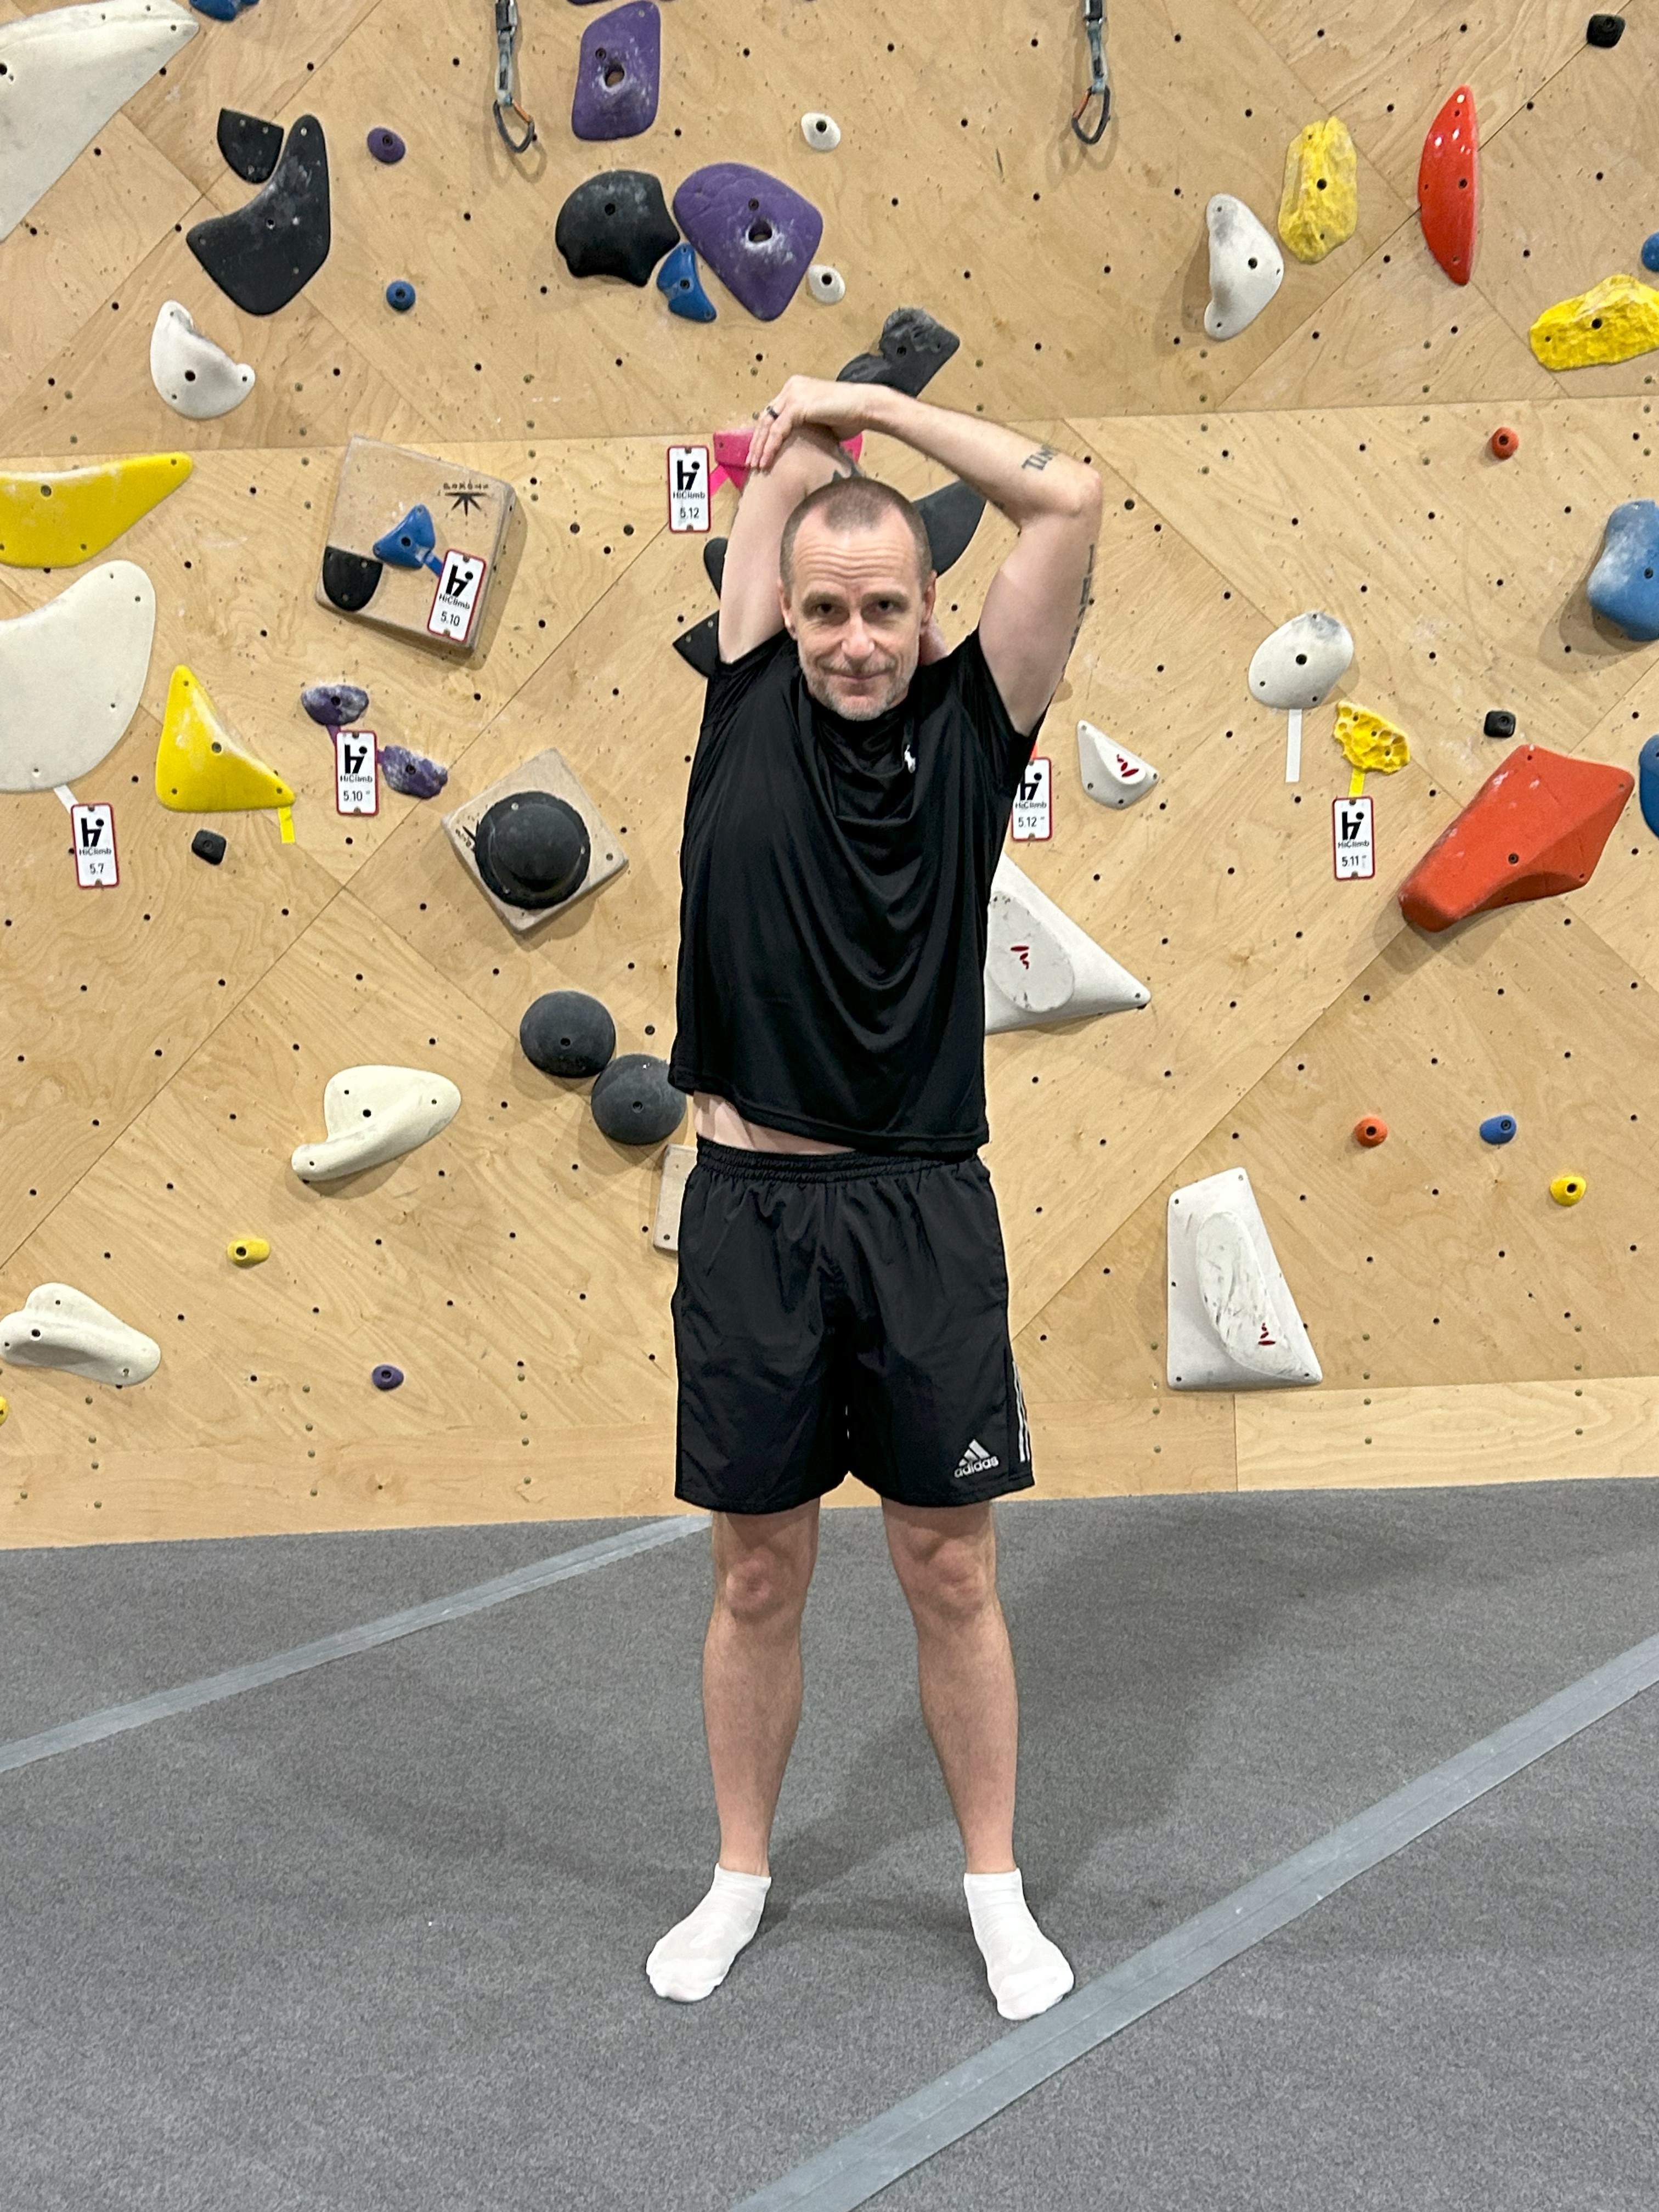
Triceps – Bring one arm bent to your back and pull the arm to the side while leaning towards that side. Do this for both sides.
First hip stretch – Put one foot crossed over the other and lean down. Do this for both sides.
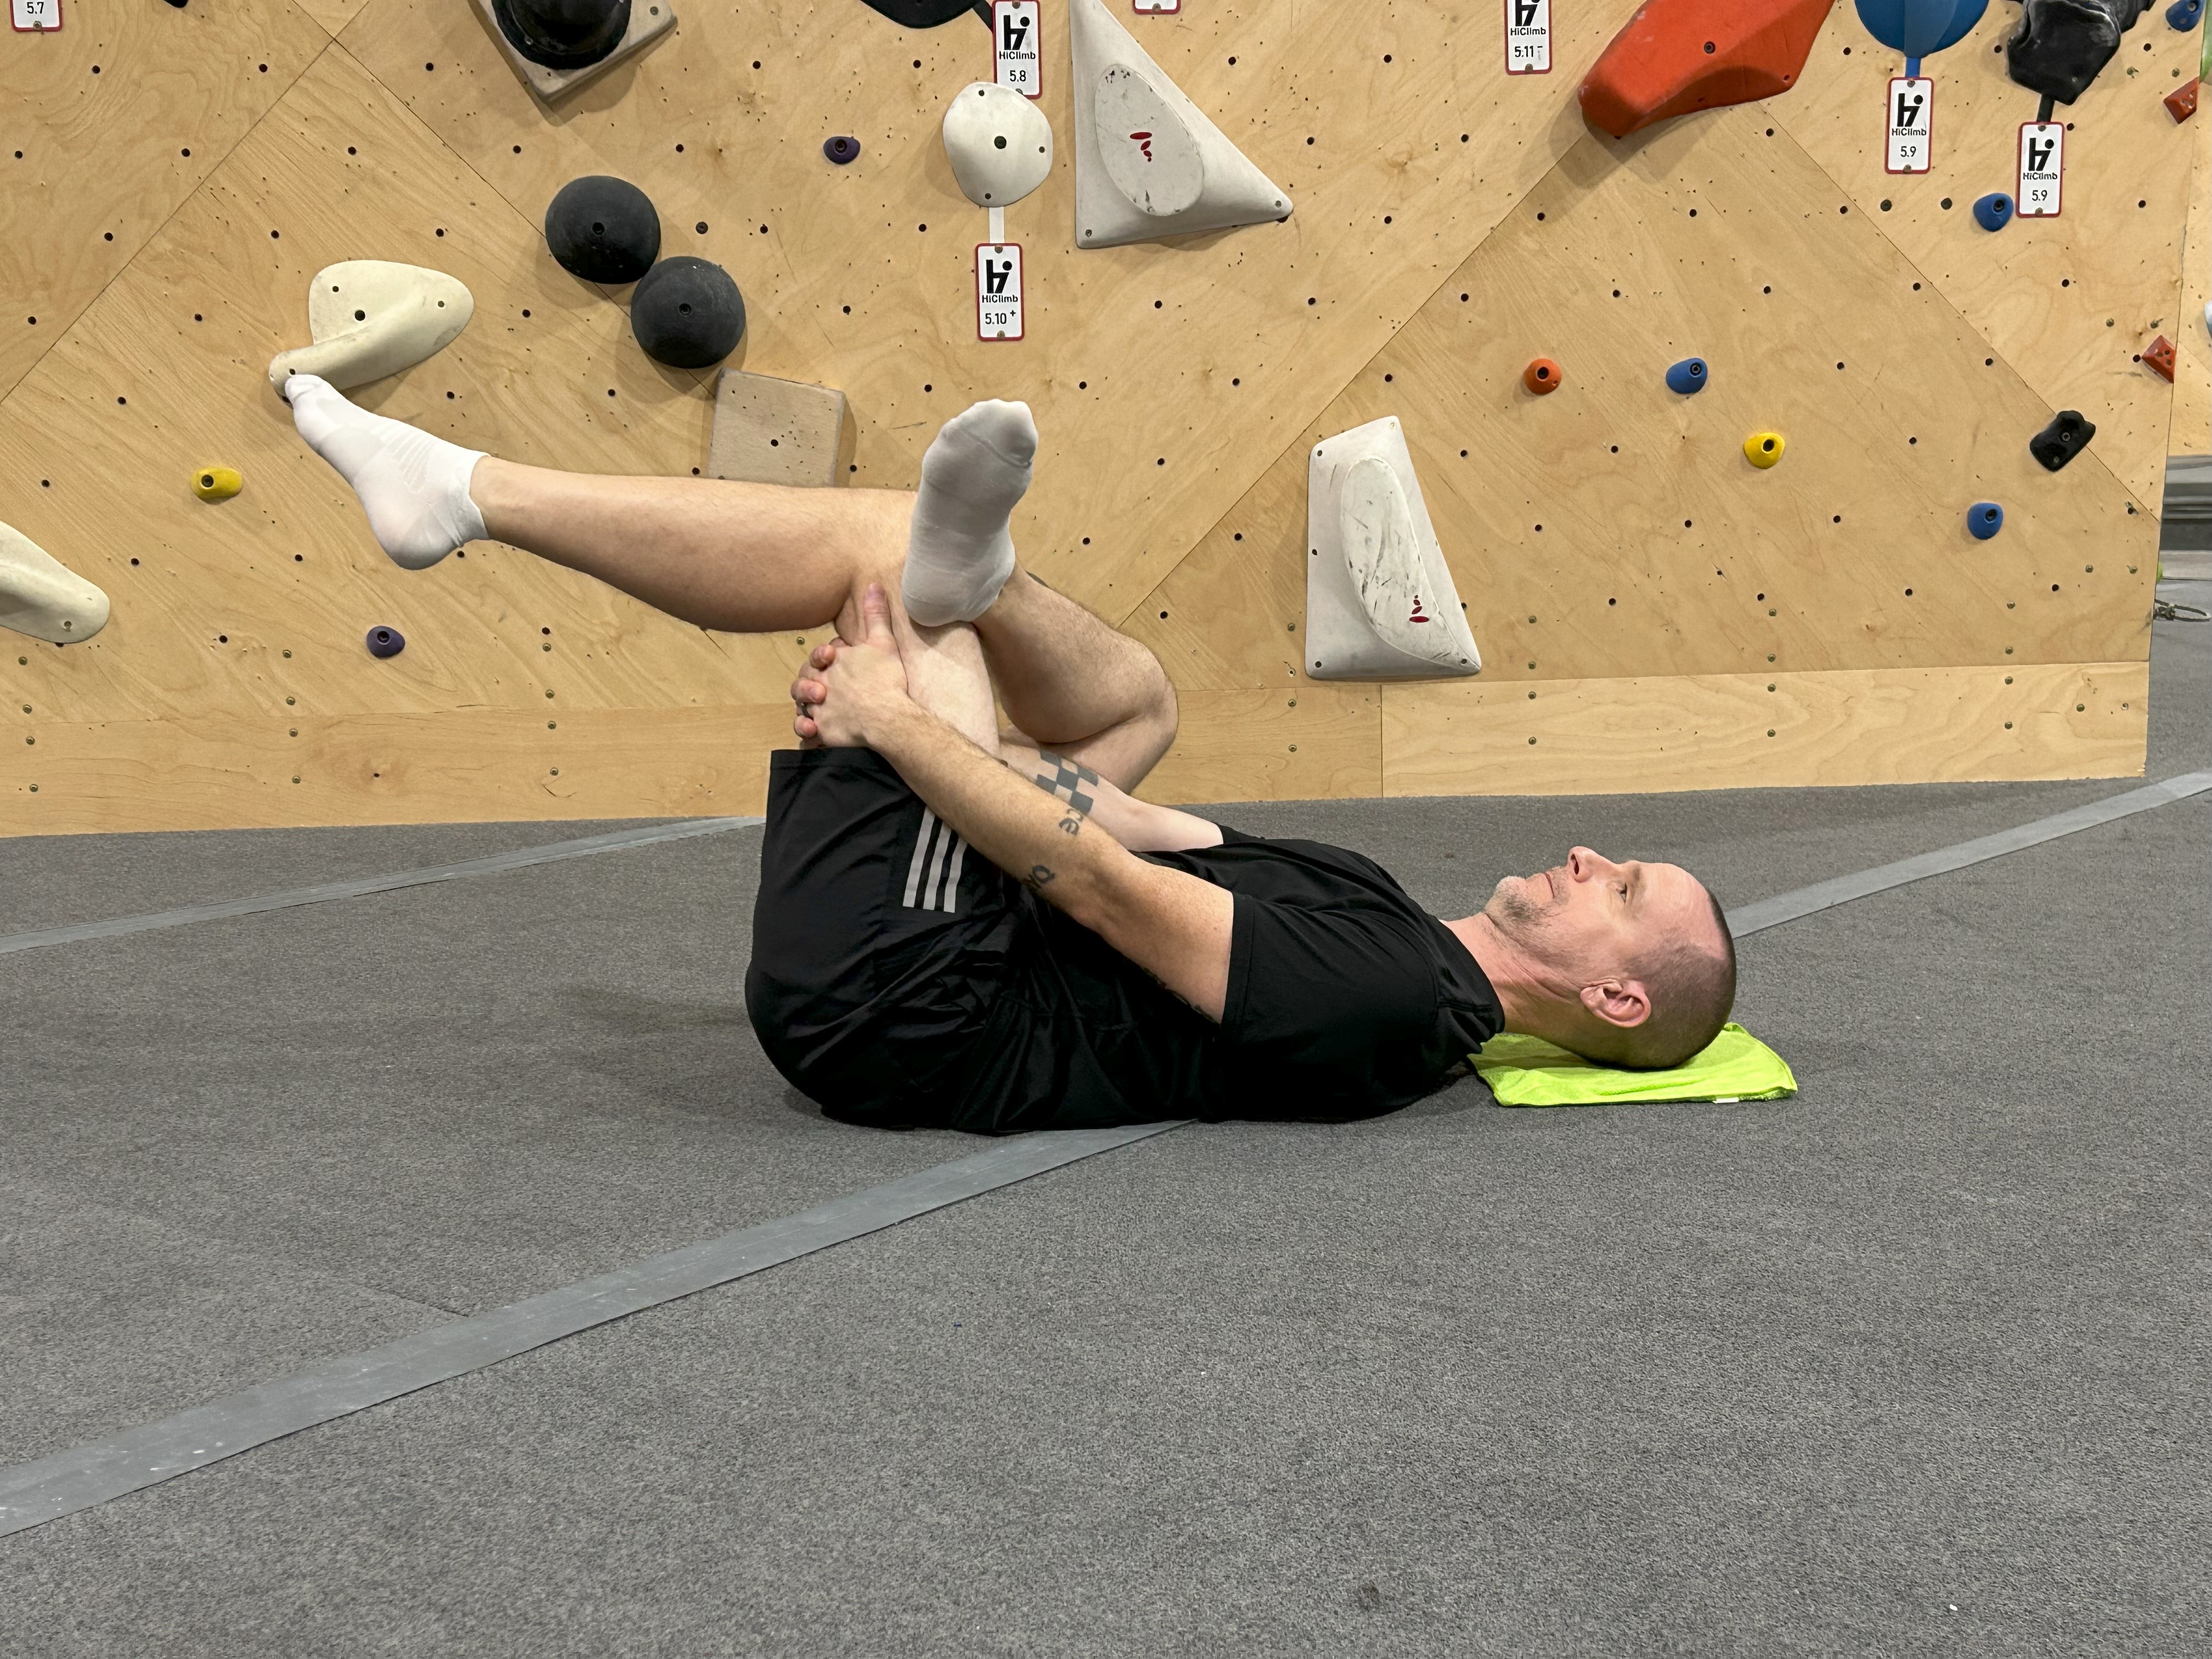
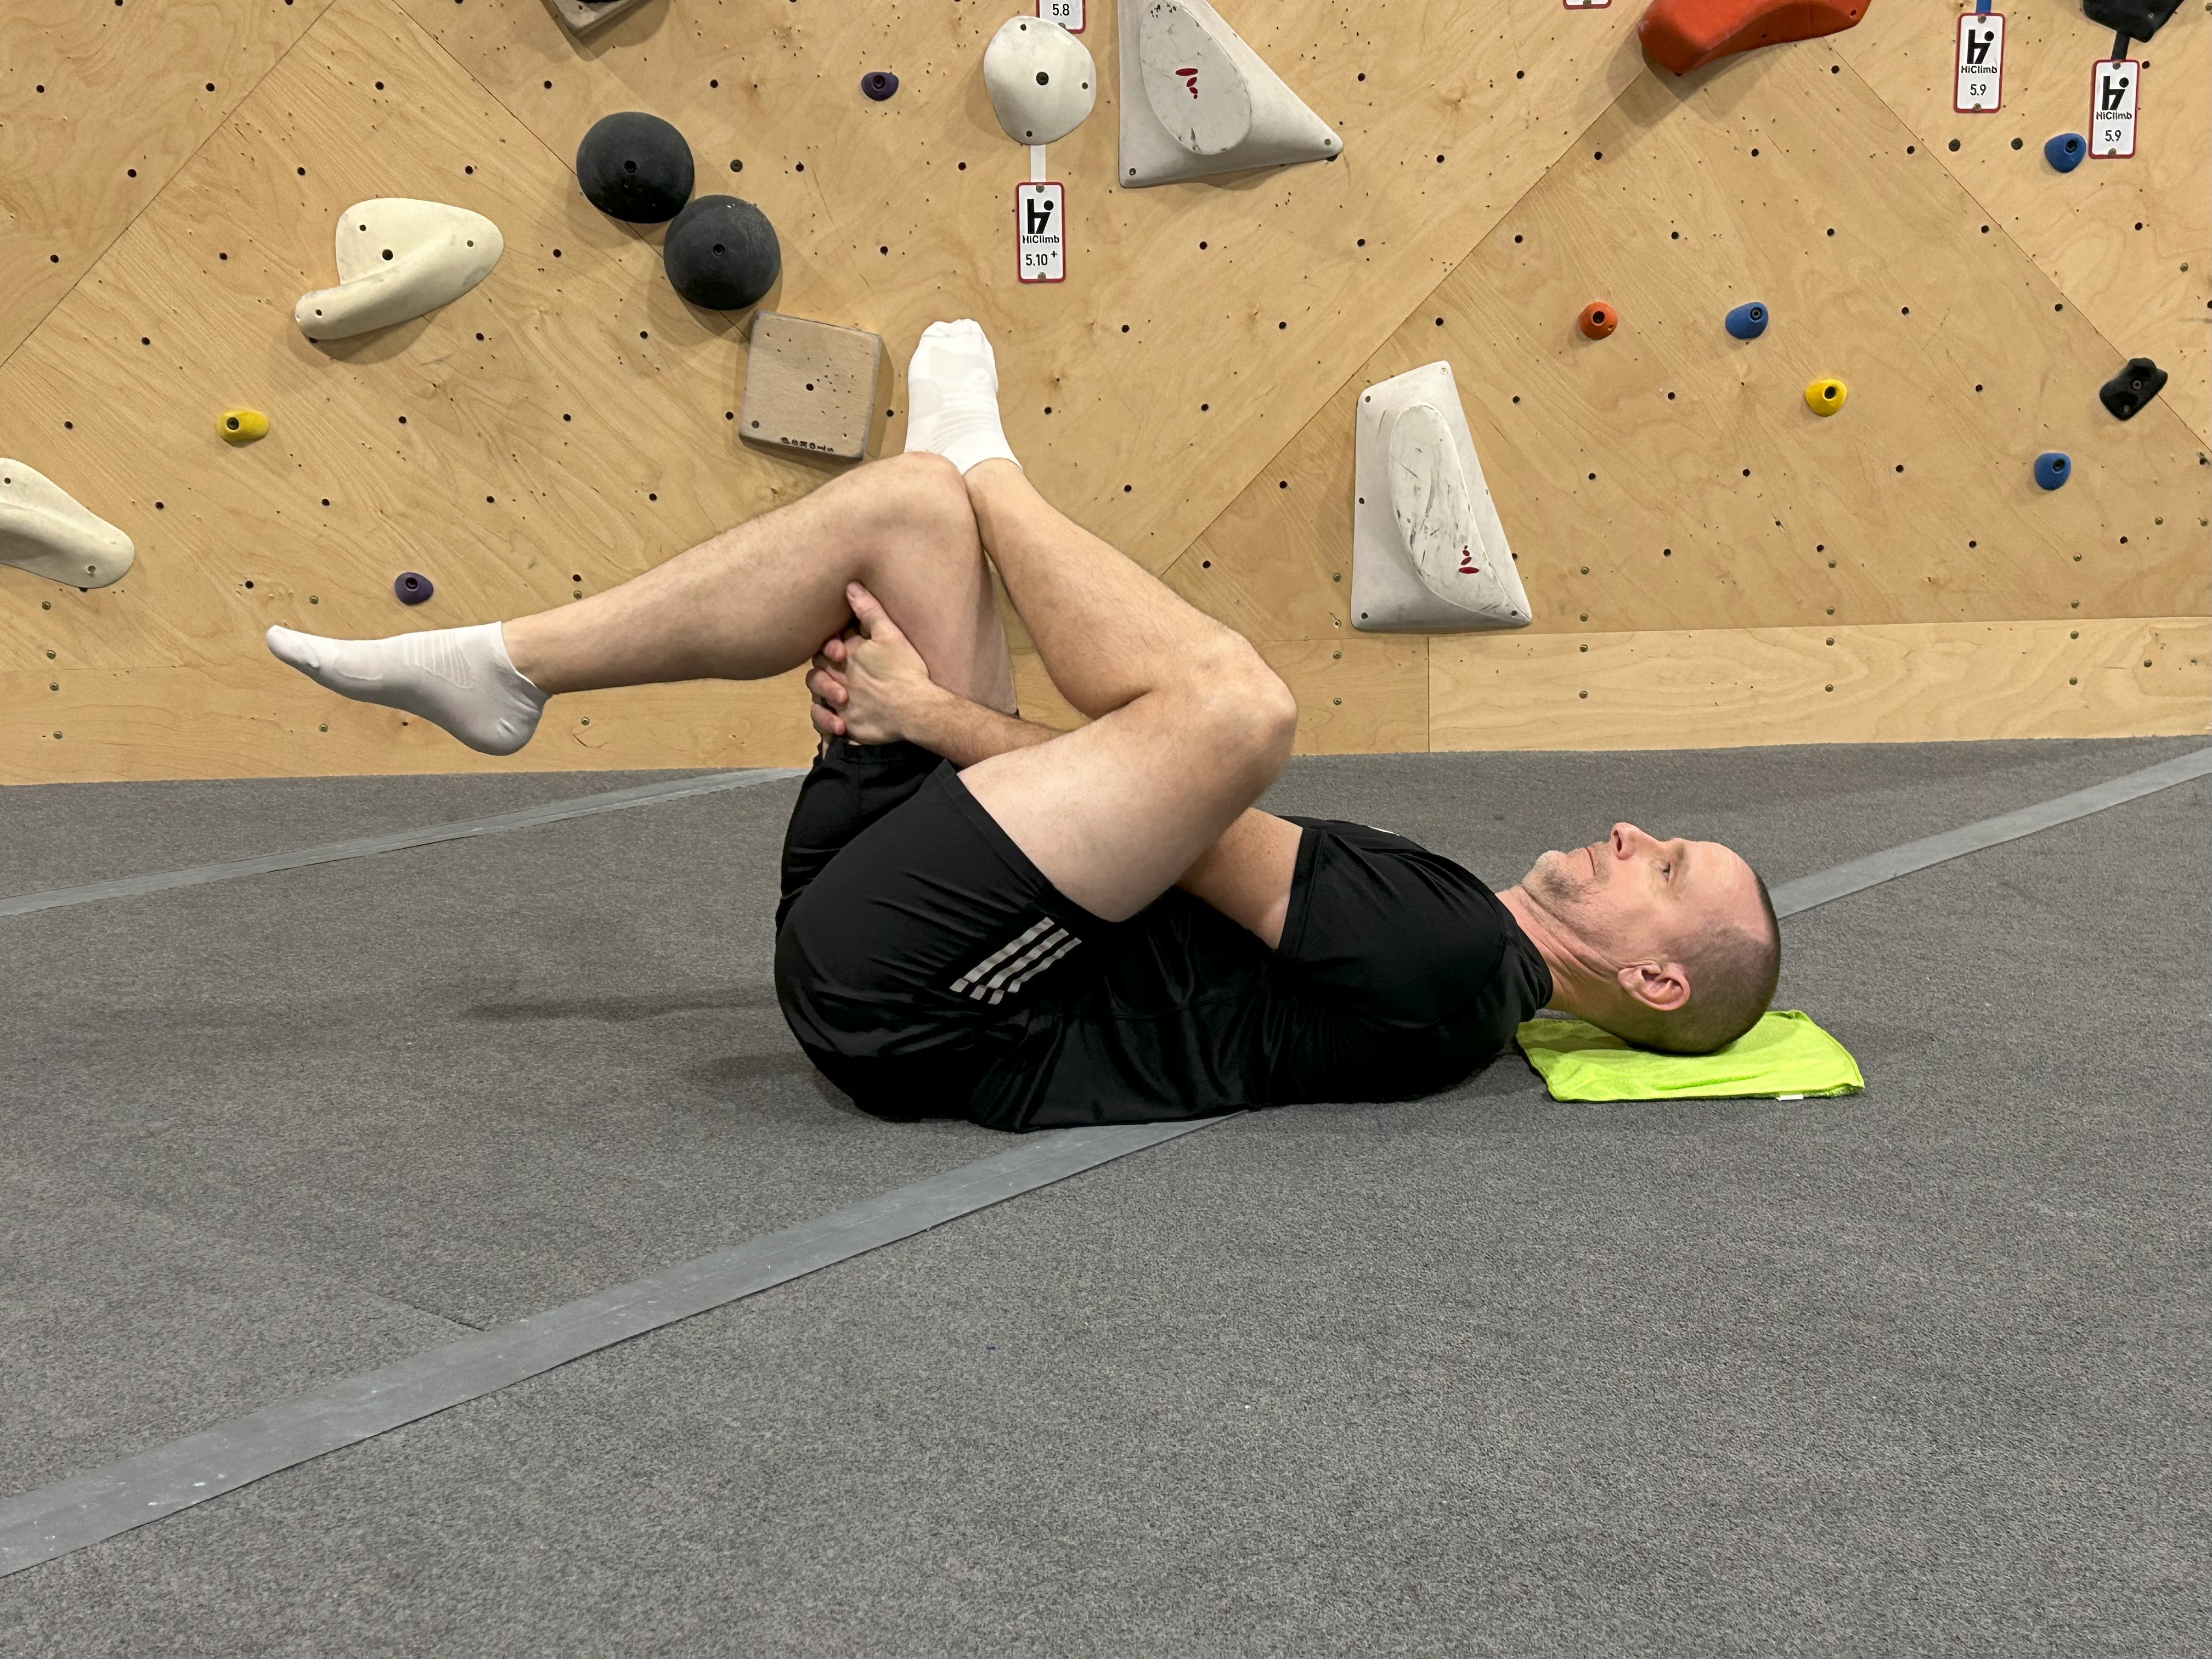
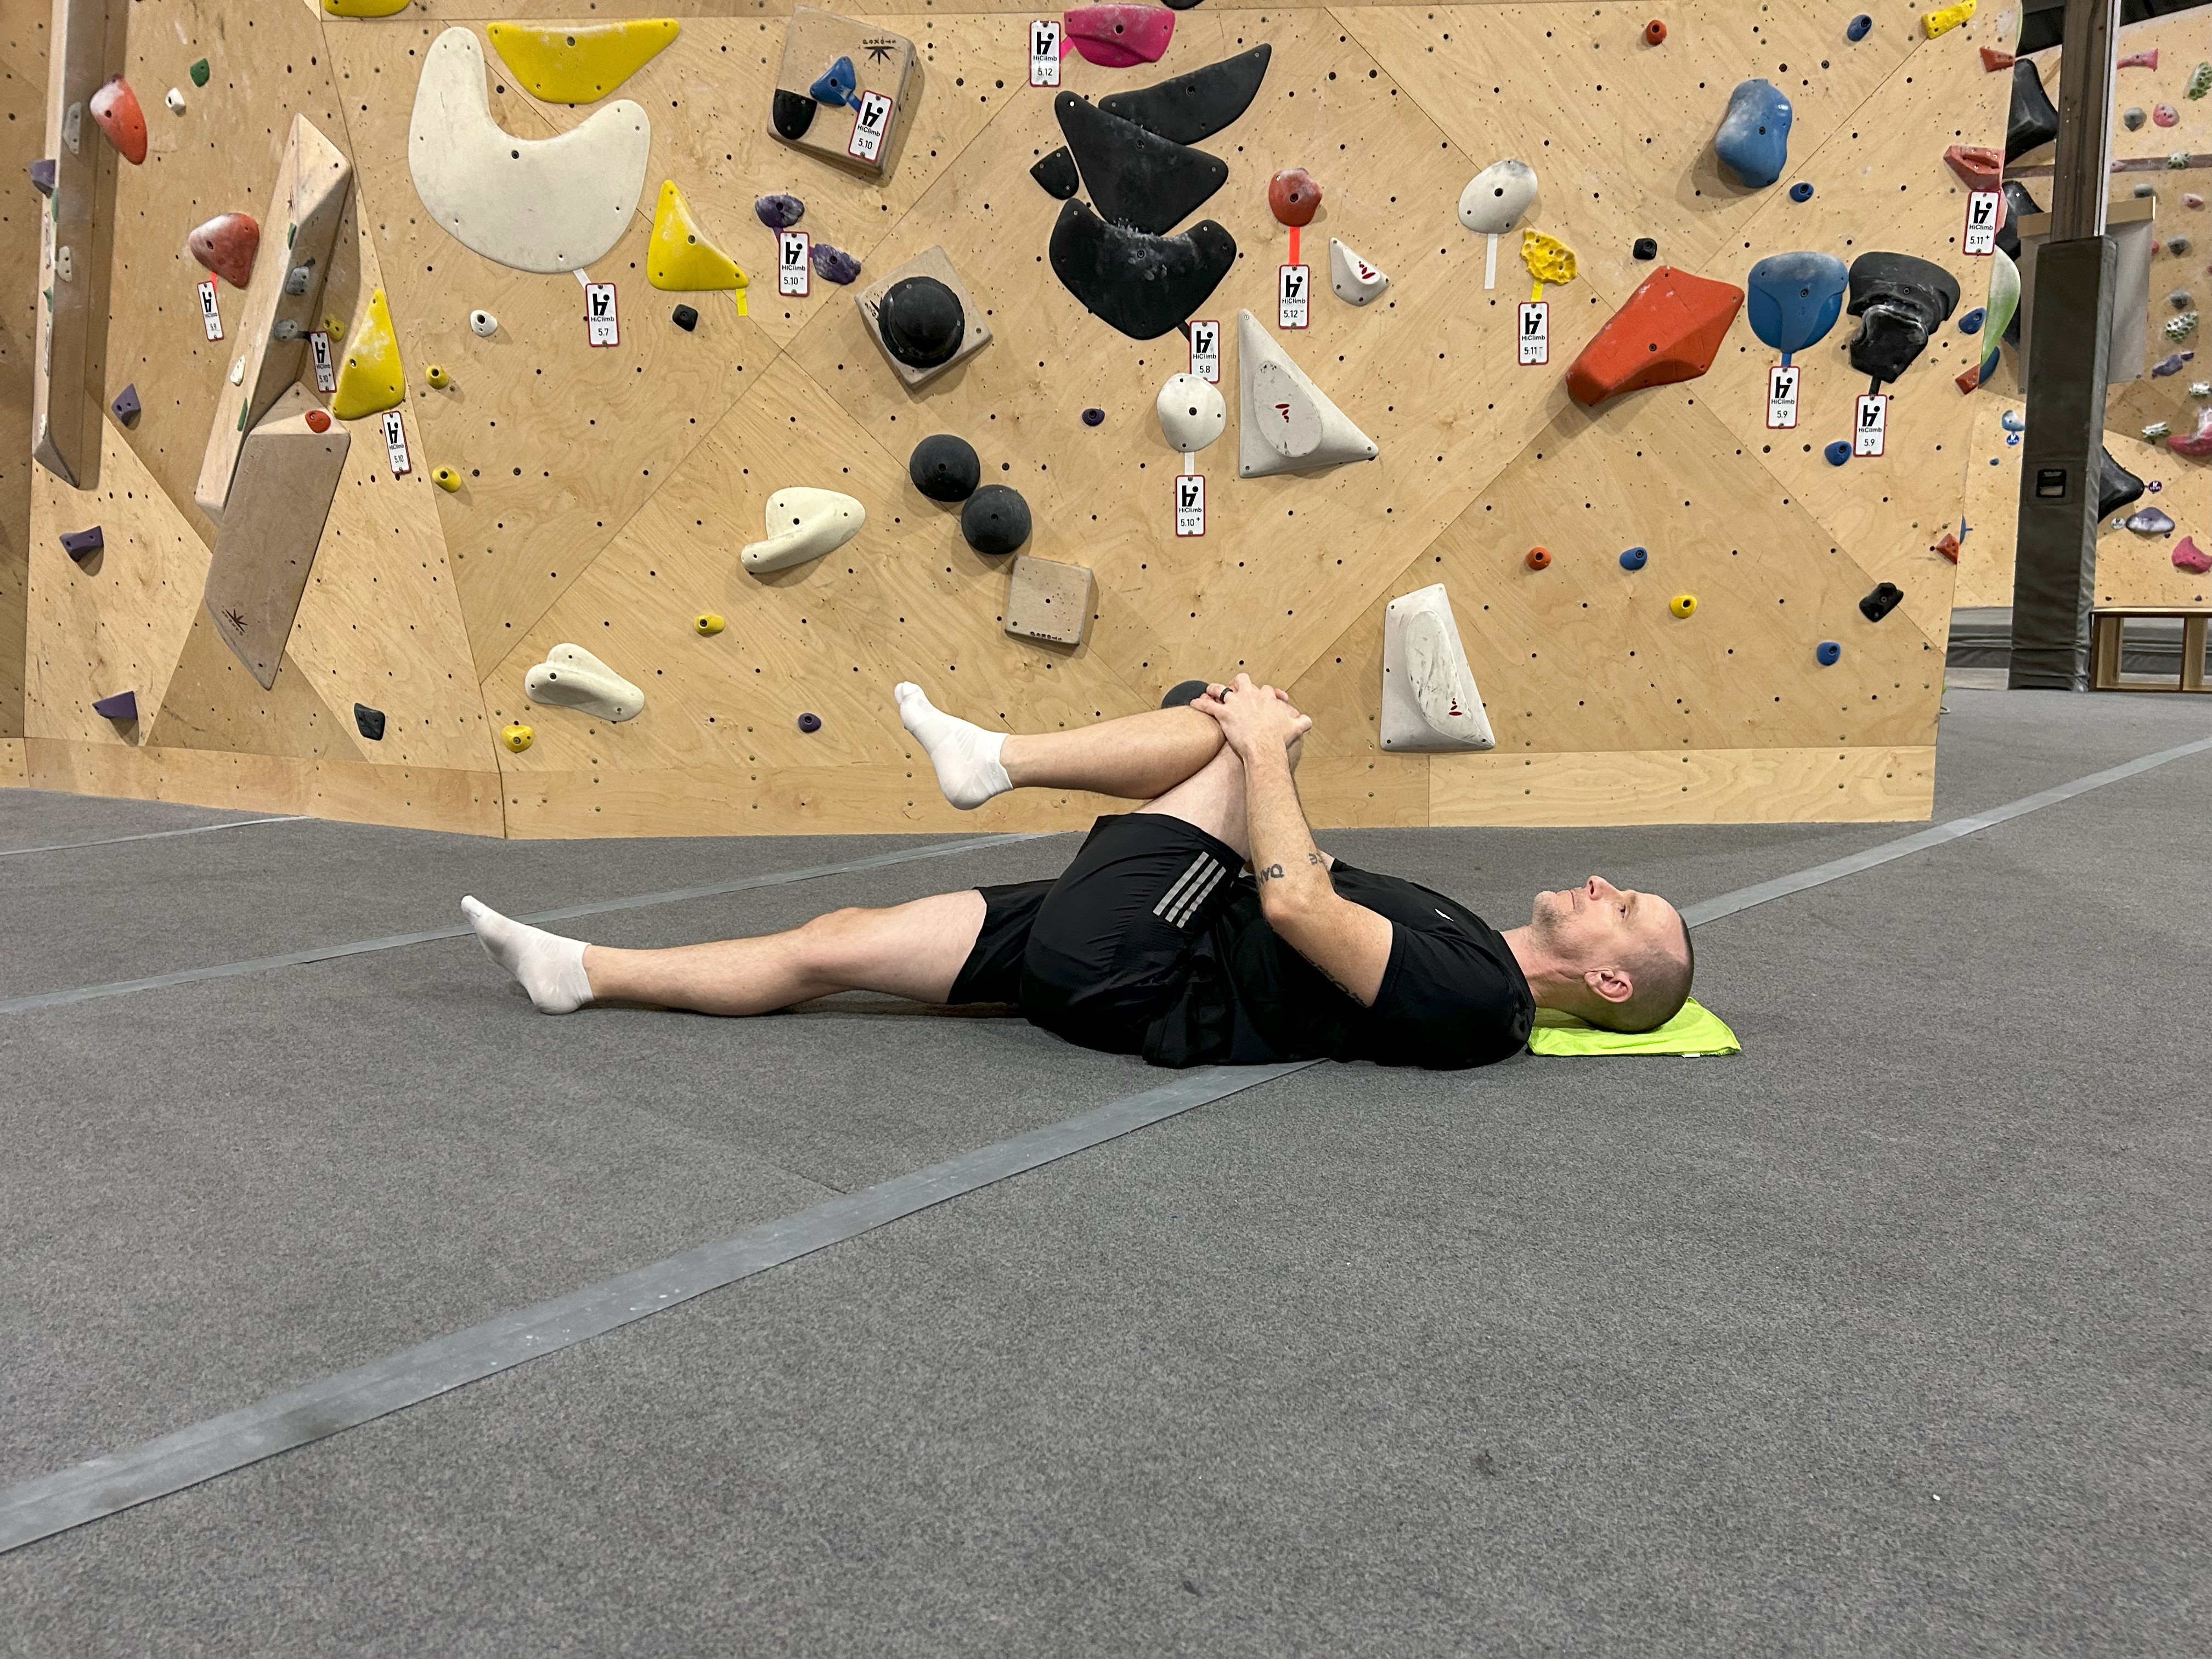
Second hip stretch – Lay down with your back on the floor. Put one foot on the other legs knee and bring your two legs towards your body. Do this for both sides.
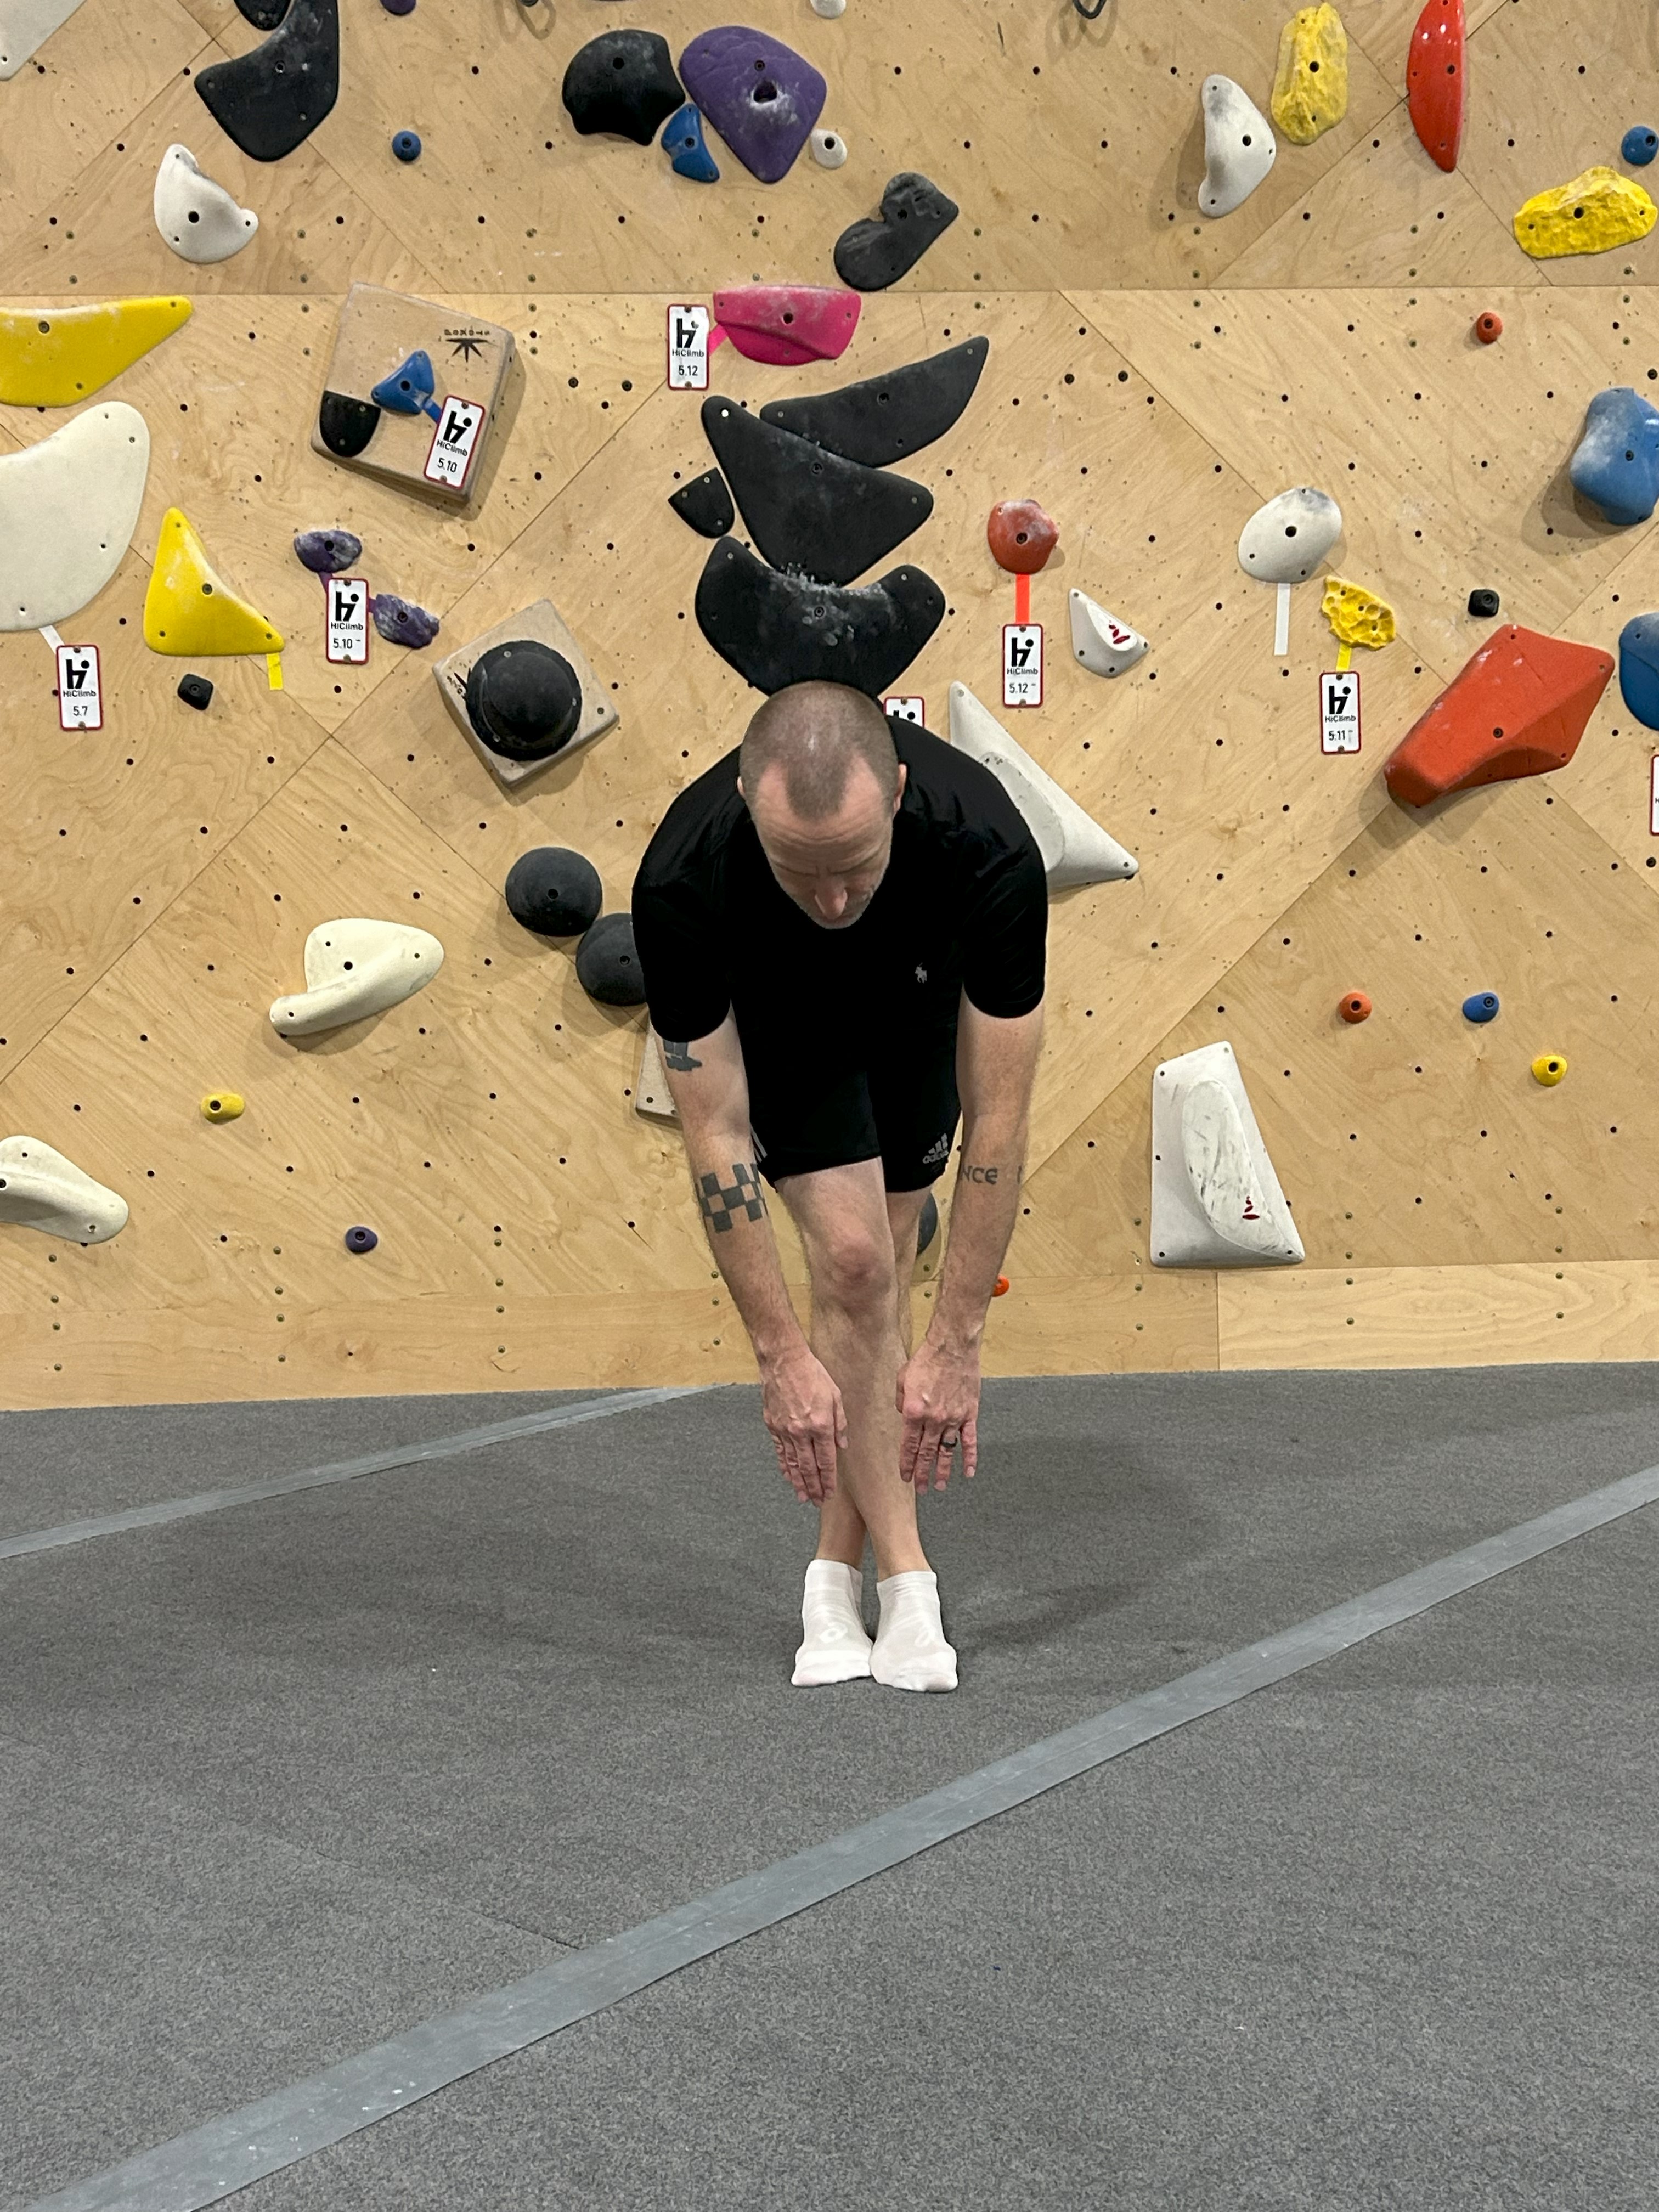
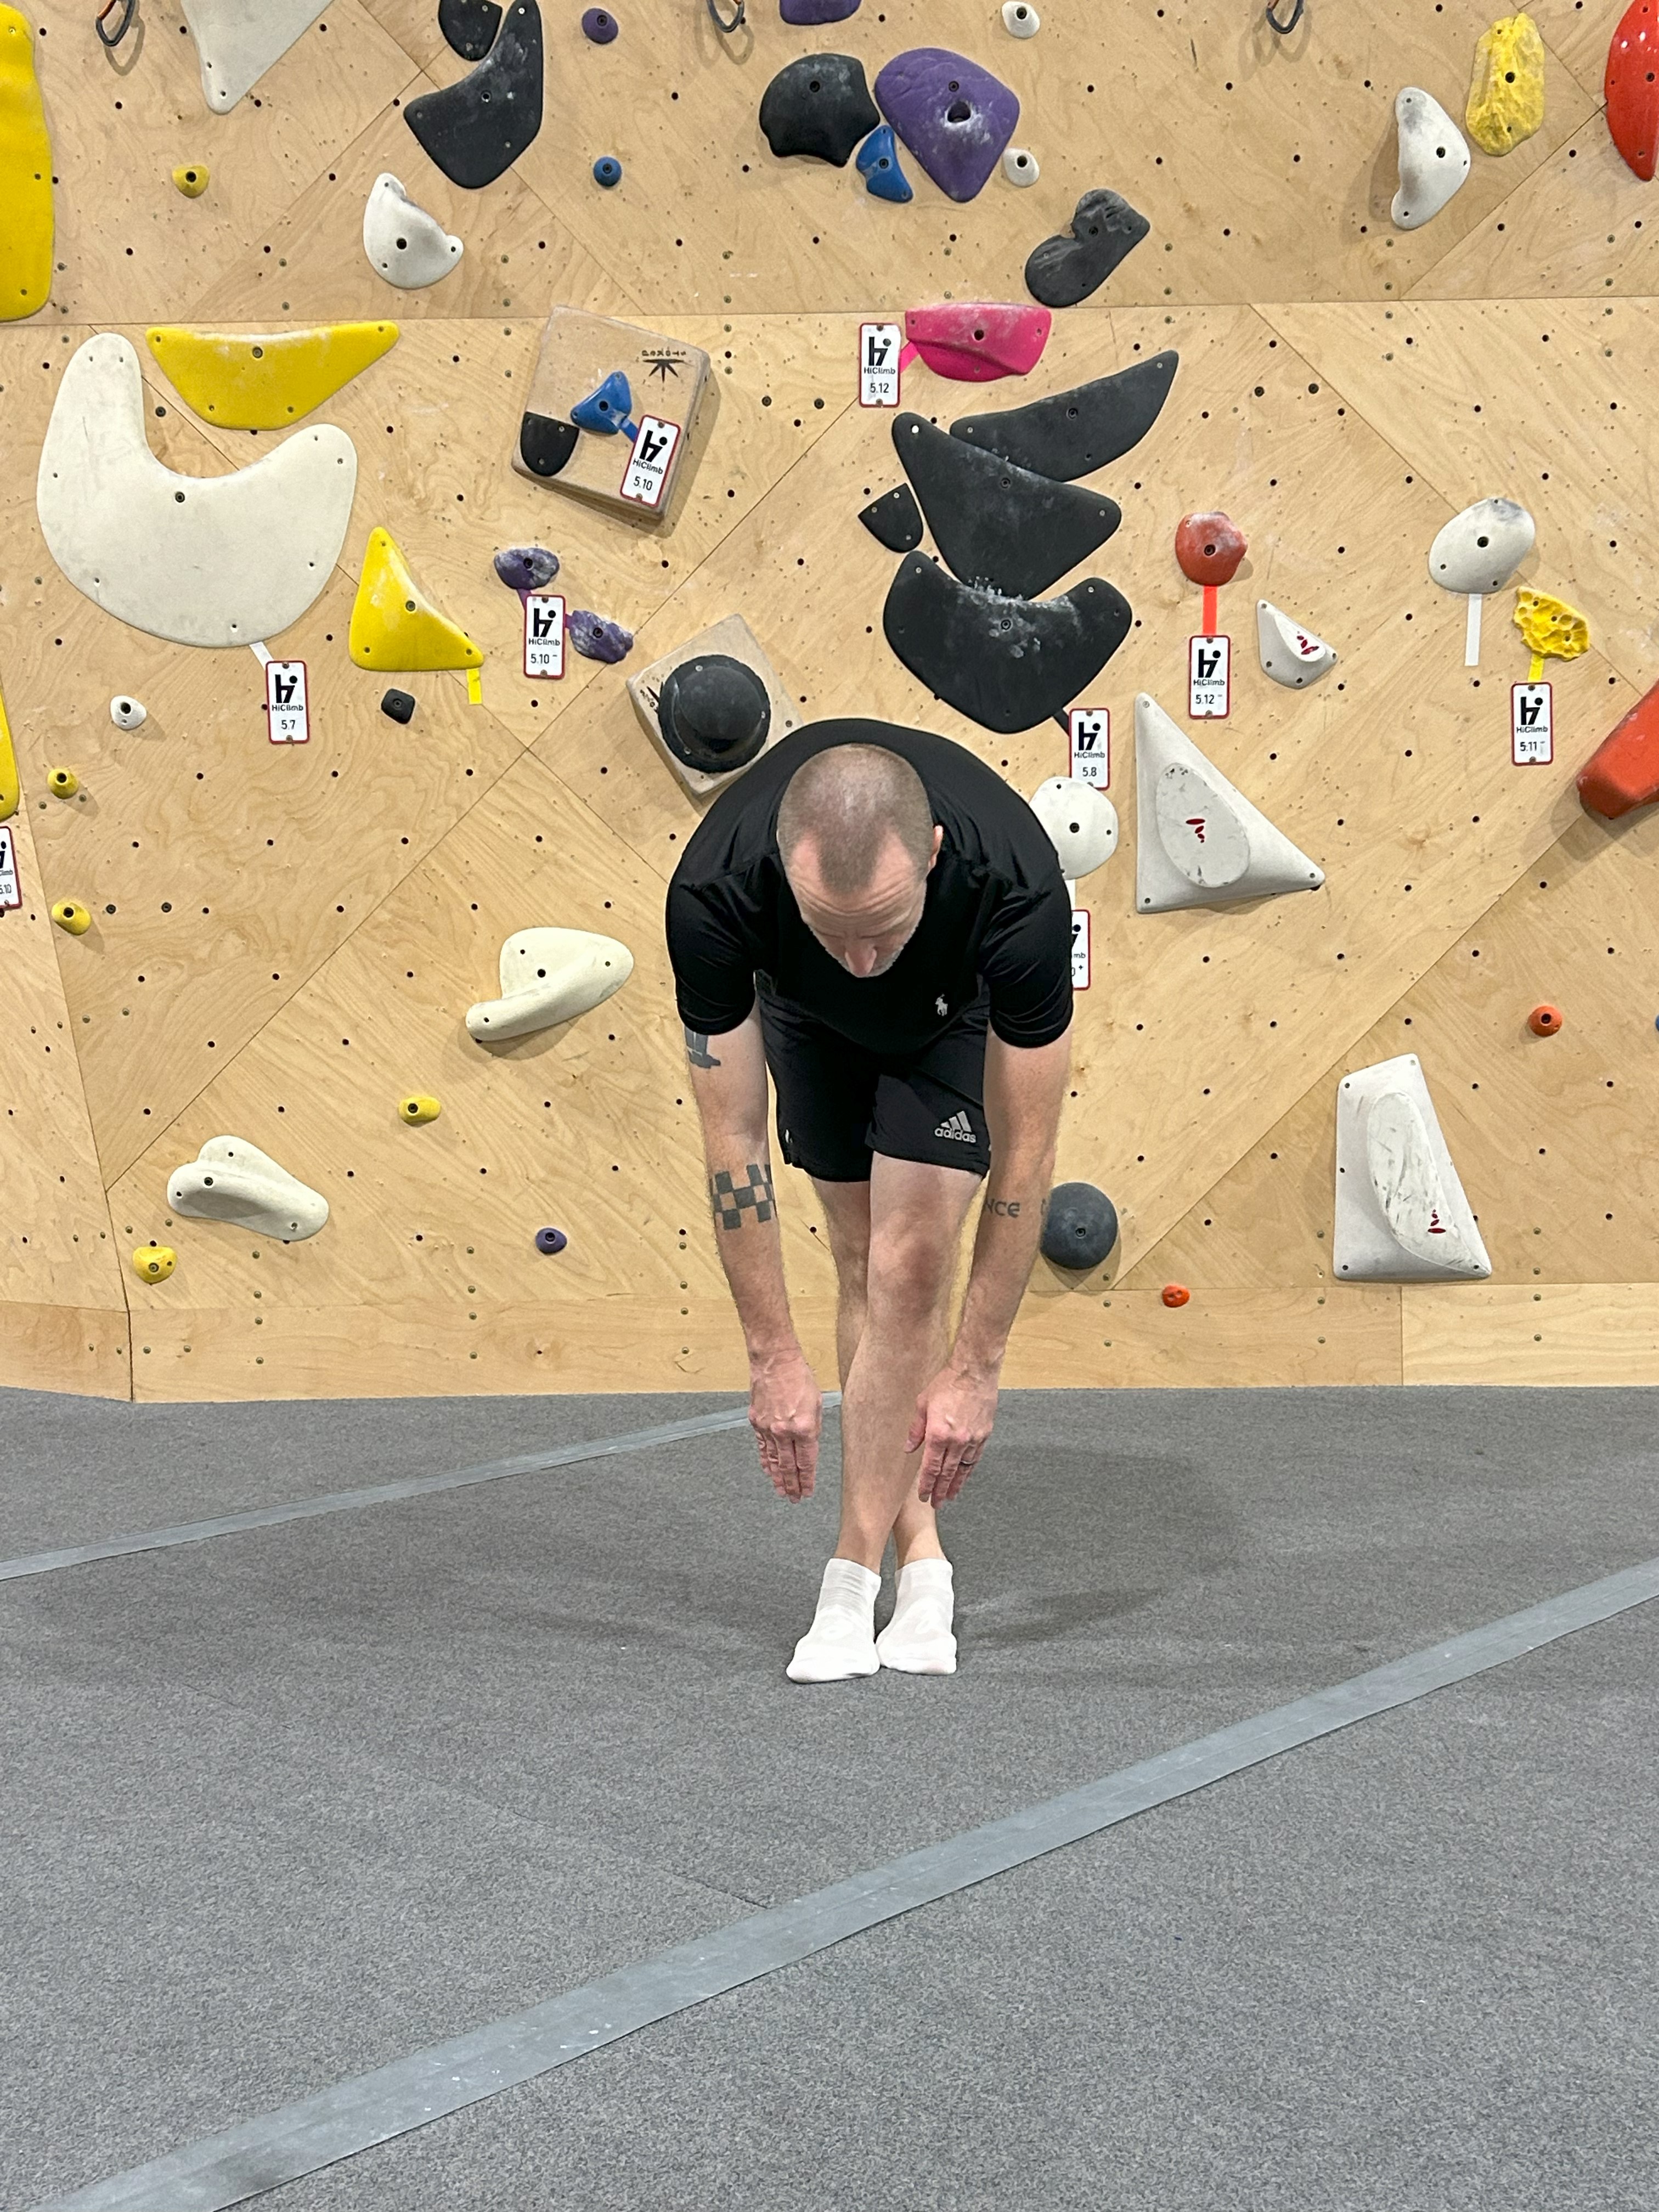
Hamstring – Lean down while placing your hands on your thighs. After 5 seconds, place your hands behind your knees. After 5 seconds, place your hands on your calves. After 5 seconds, try to touch your toes.
Calves – Stand straight up, put one leg back, and lean into it. Do this for both sides.
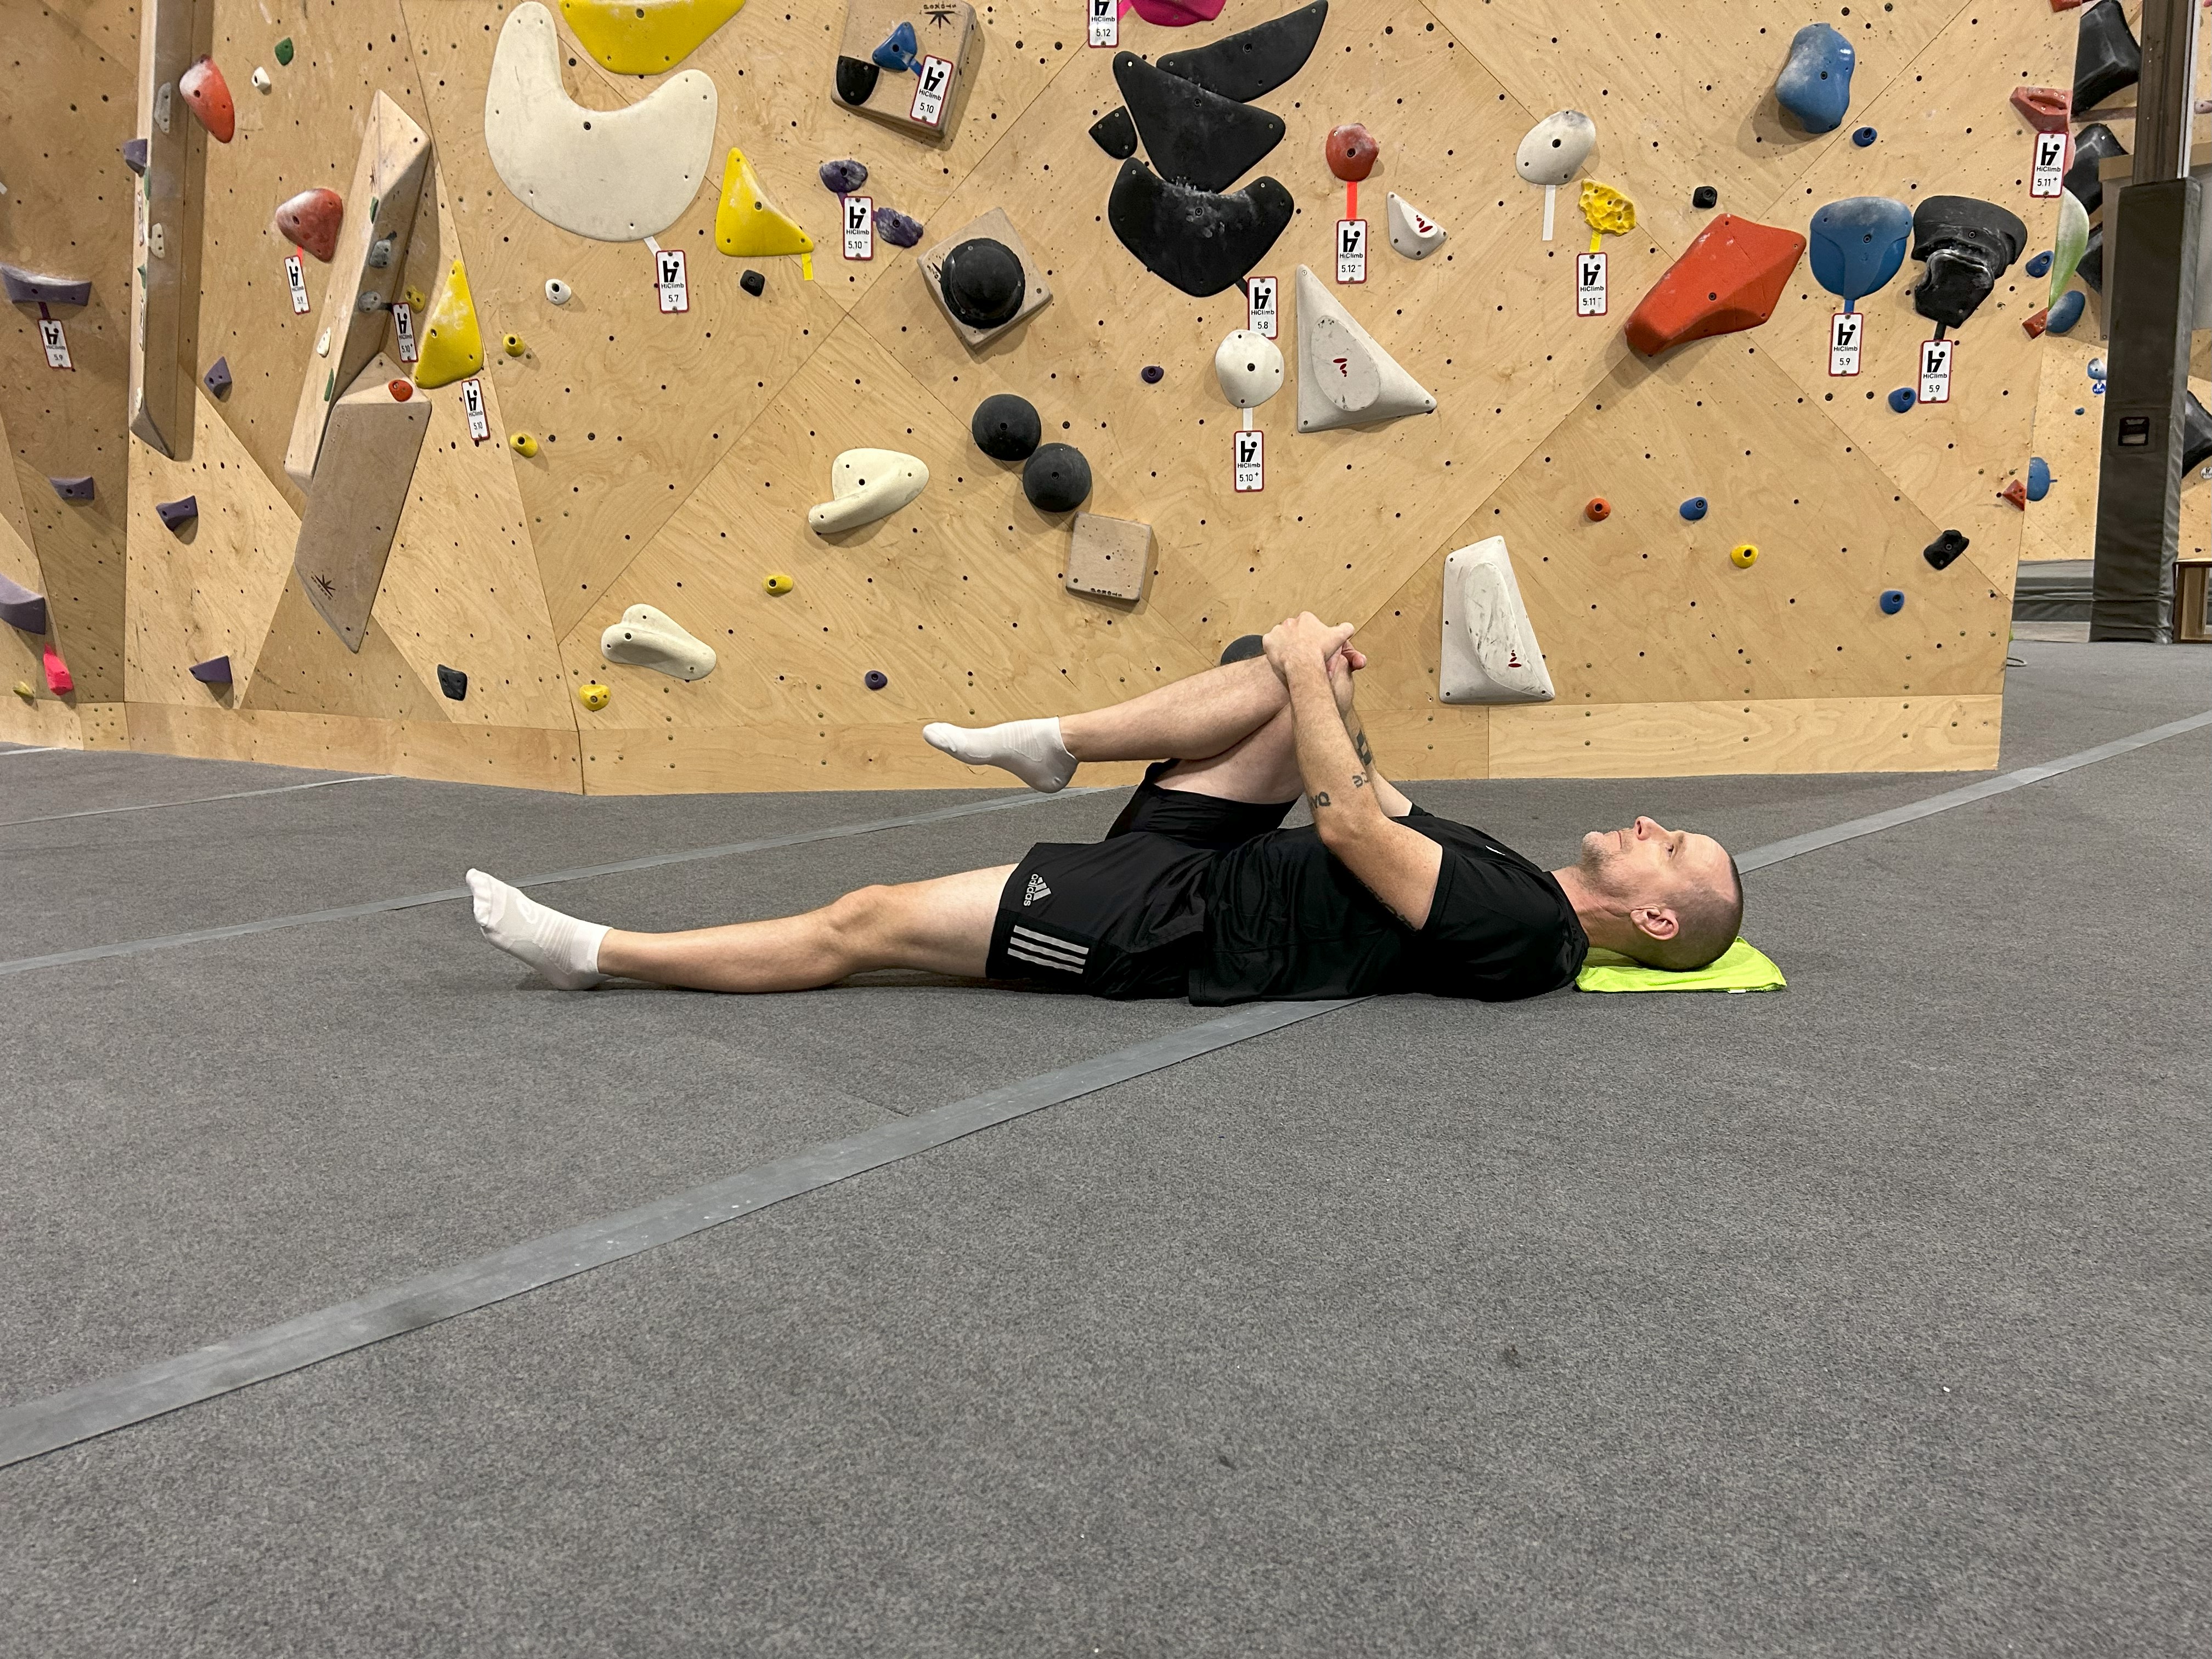
Glutes – Lay down with your back on the floor. Bend one leg and pull it to the opposite side.
Disclaimer: This website only provides tips for indoor rock climbing. Additionally, individuals must be responsible for their own health and safety.